
With the recent emergence of highly advanced large language models (LLMs) like OpenAI’s GPT-4, Anthropic’s Claude 3, and Google’s Gemini 1.5, subscribing to each AI service separately and paying monthly subscription fees can become quite costly.
However, each large language model has its strengths and weaknesses for different tasks, so it’s often desirable to use various models depending on the situation.
Fortunately, there is a dream tool that allows you to quickly use all kinds of large language models like GPT-4, Claude 3, Gemini, Mistral, Groq, and Perplexity on a single chat interface without monthly contracts by utilizing each company’s API keys.
That tool is “ChatbotUI,” an open-source application developed by Mckay Wrigley.
Using the “ChatbotUI” application itself is completely free. You can install it locally on Mac or Windows, or use it from a browser if installation is too troublesome.
While there are small fees based on each company’s API usage, considering that the subscription fees for each company’s large language models are around $20 per month, using ChatbotUI is definitely cheaper if you want to use multiple models.
In this article, we’ll introduce the steps to actually run Anthropic’s Claude 3 Opus and OpenAI’s GPT-4 models using the browser version of ChatbotUI.
Furthermore, for intermediate and advanced users, we’ll also explain how to install Chatbot UI on your Mac, run APIs in a local environment, and load local files and images into each model, so please refer to it.
How to Use the AI Chat App Used Even at Famous Universities
Chatbot UI is an open-source AI chat application that can be installed on your Mac/PC from the repository published on Github by the developer Mckay Wrigley and used locally right away.
Since it’s open-source, it can be run for free on school or corporate servers. In fact, the University of Tokyo, Japan’s top national university, has provided an in-house generative AI chat service using this Chatbot UI.
However, at present, the installation process may be a bit difficult for beginners.
That’s why we recommend the Official Hosted Version of Chatbot UI that can be used on a browser.
You can start using Chatbot UI on a browser just by registering your email address, without any troublesome installation work.
If you use your favorite LLM’s API key and only want to use standard chat functions, it’s all free to use. For the purpose of using text chats of multiple LLMs, the free version of the Hosted Version should be sufficient.
To enable more advanced features like file uploads, a monthly fee of $8 is required for the Hosted Version, but if you install it locally, all features are free.
It’s probably better to try out the free features of the Hosted version first, and if you like it, put in the effort to install it locally rather than paying the $8 fee.
The screen layout and usage are the same whether it’s the Hosted version or the local version, so the following will provide a detailed explanation assuming you’re using the free Hosted Version on a browser first.
We’ll also introduce what it’s like to actually use the local installation version installed on a Mac with an M3 chip, so those who want to use all the advanced features for free should check it out until the end of the article.
How to Obtain API Keys: The Case of Claude 3 Opus
What is an API Key in the First Place?
An API key is like a personal passcode for using AI services such as GPT-4 and Claude.
By entering the API key into an application, you can chat with GPT-4 or Claude 3, and the owner of that API key will be billed for the usage.
To obtain an API key, you usually need to create an account on the website of the company providing the service, such as OpenAI, Anthropic, or Google, and have them issue an API key.
In the case of GPT-4 and Claude 3 Opus, if you pre-charge money into your account, fees will be deducted from the charged amount according to the usage of the API key, which is a pay-as-you-go system.
Here, we will introduce how to obtain an Anthropic API key, assuming you will be using Opus, the top-tier model of Claude 3.
How to Issue a Claude API Key on the Anthropic Website
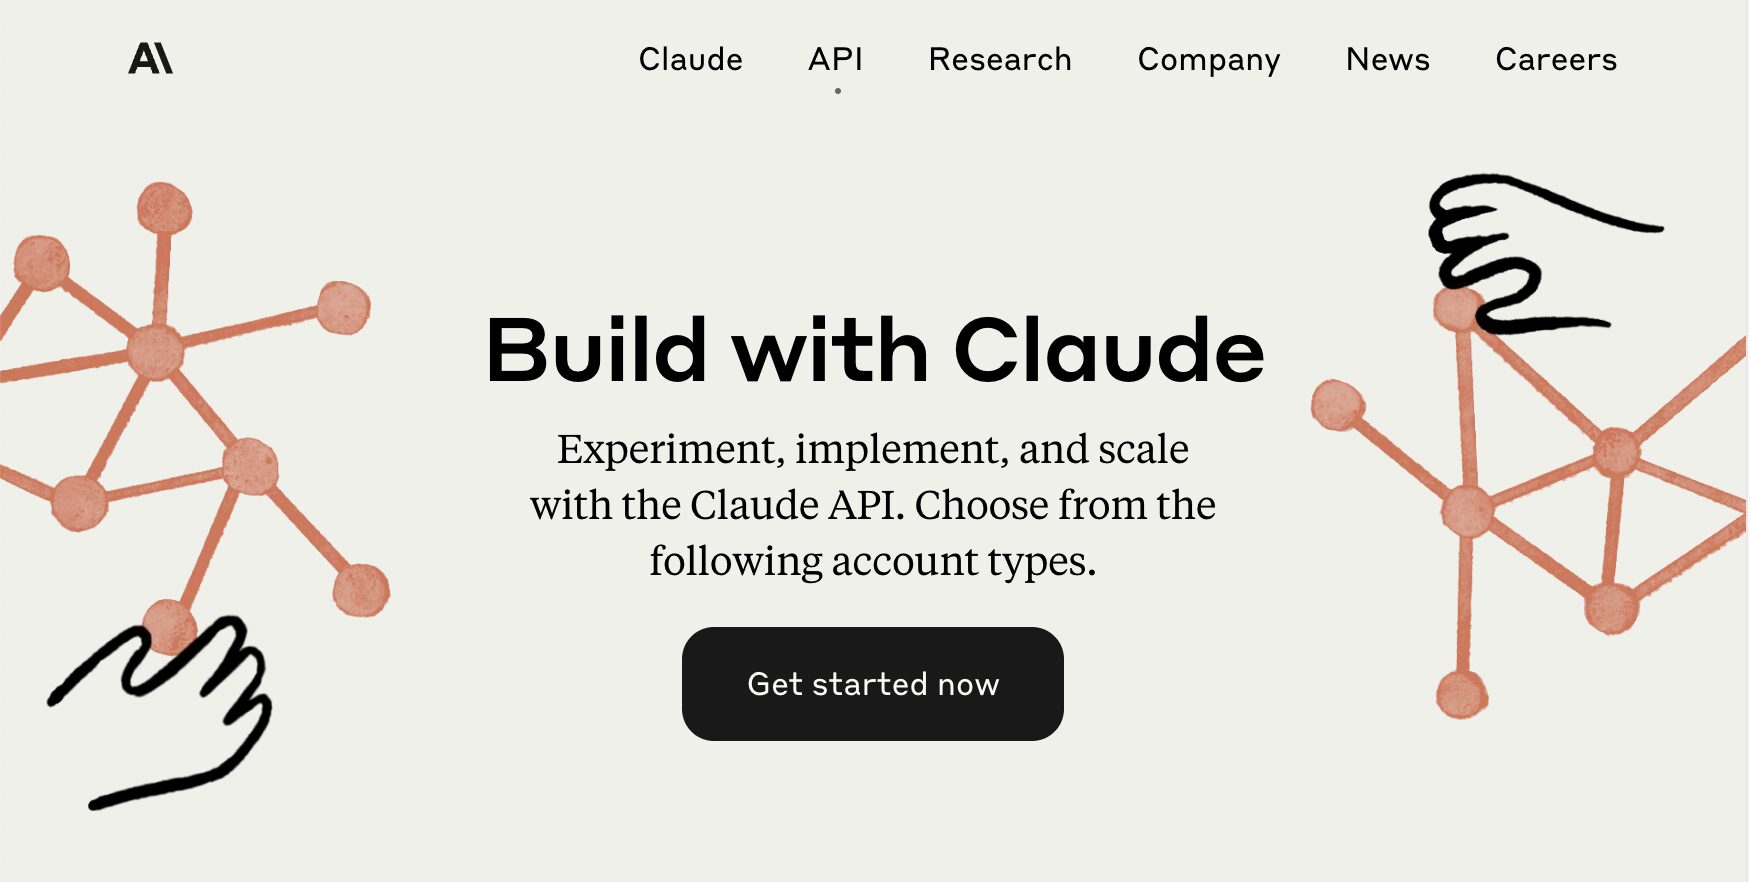
First, go to the Claude API page from the Anthropic company website. Click the “Get started now” button to proceed to the account creation screen.
After entering your email address and completing registration, proceed to the “Dashboard” where you can access development tools using the Anthropic API, and then go to “Get API Keys”.
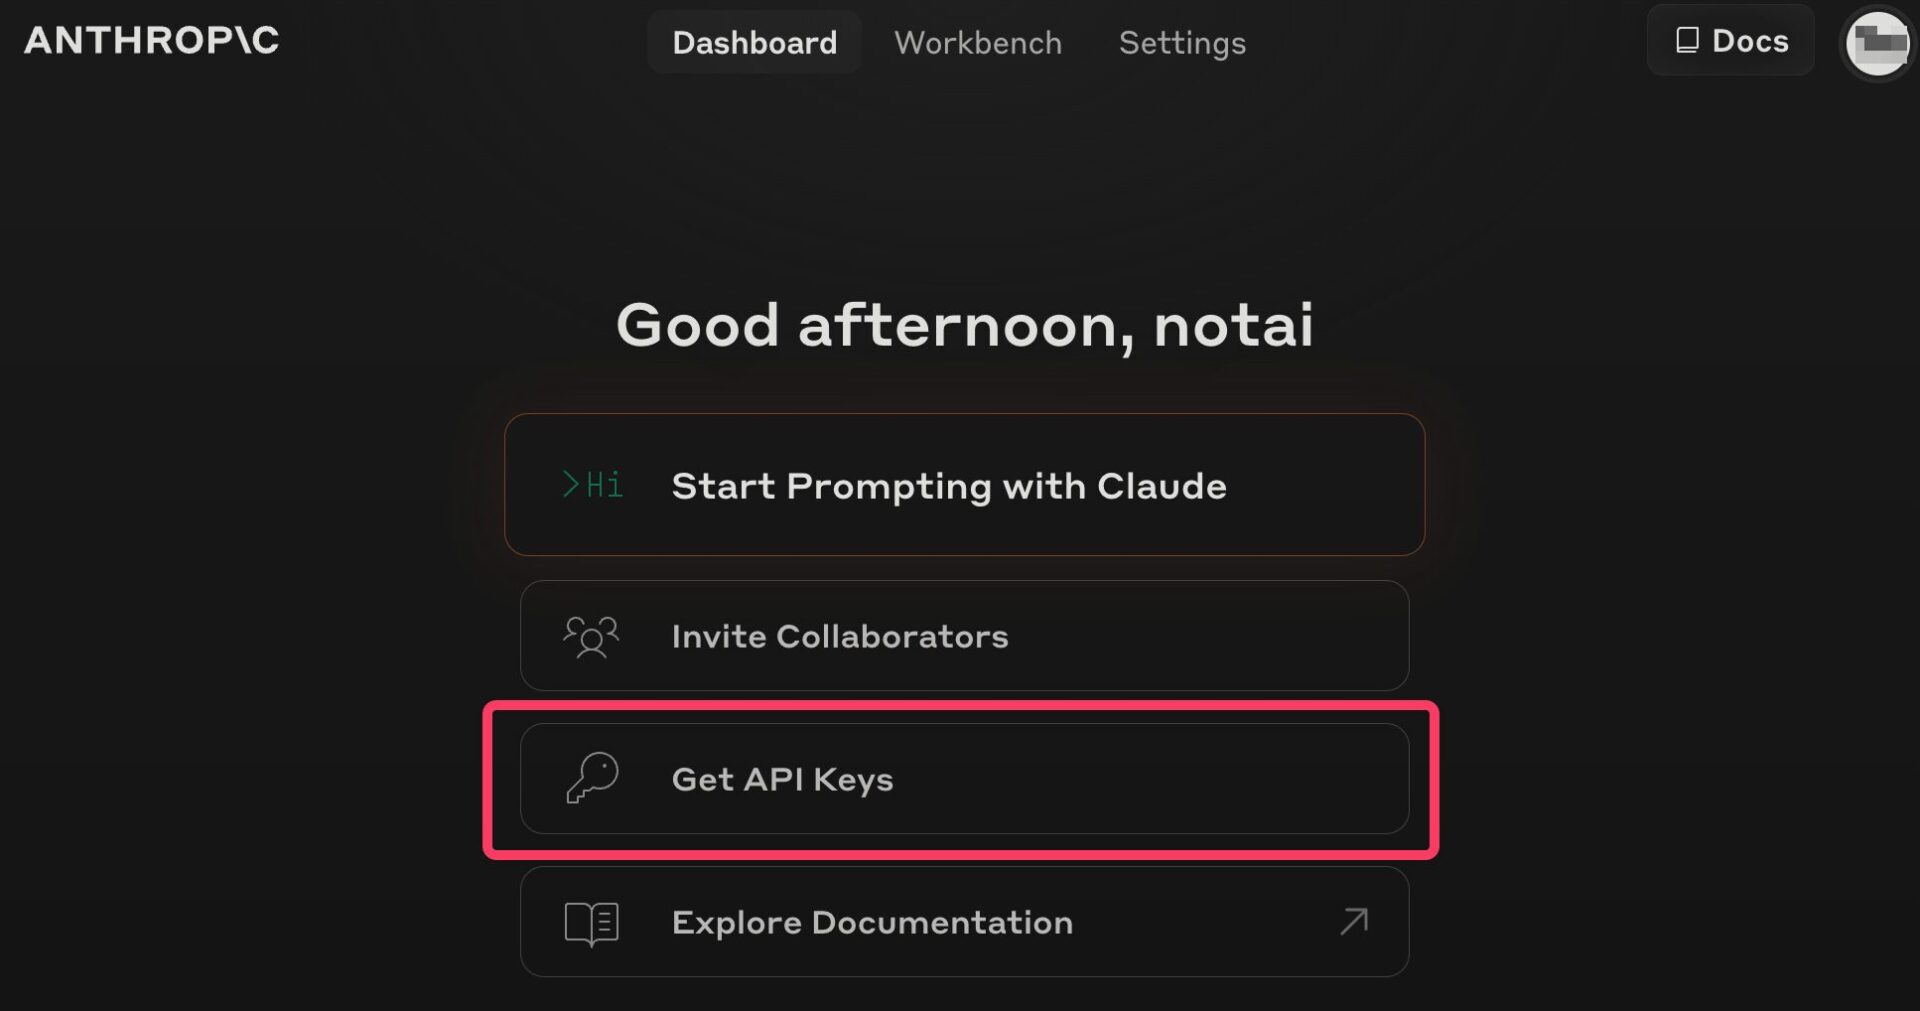
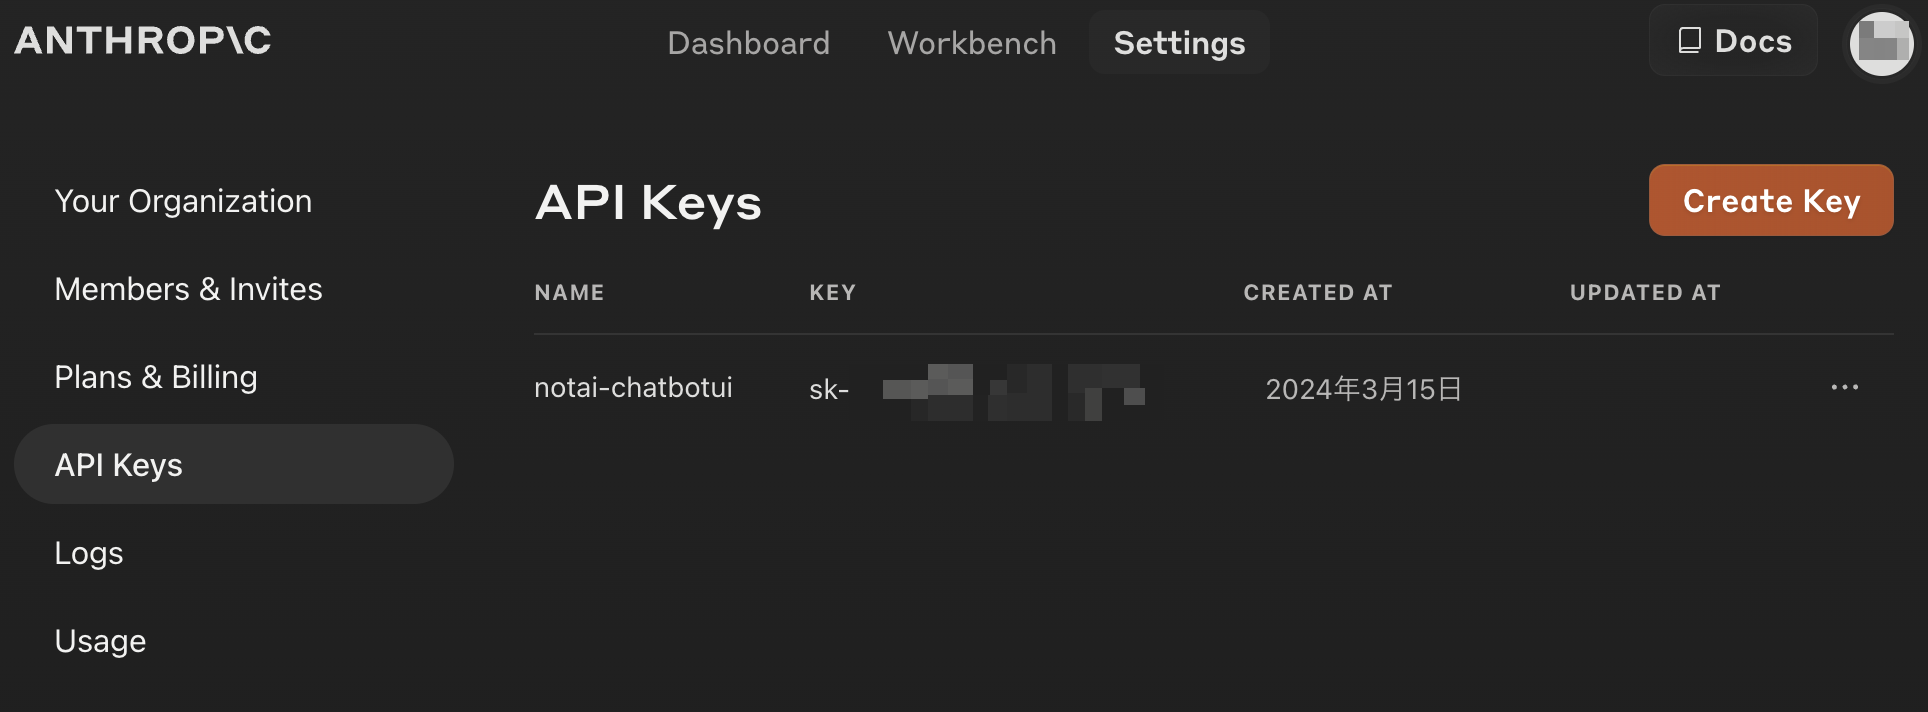
A list of API keys currently associated with your account will be displayed, so click the “Create Key” button to create a new API key.
Naming the key something easy to understand, like “chatbotui”, may make it more convenient to manage usage and billing later on.
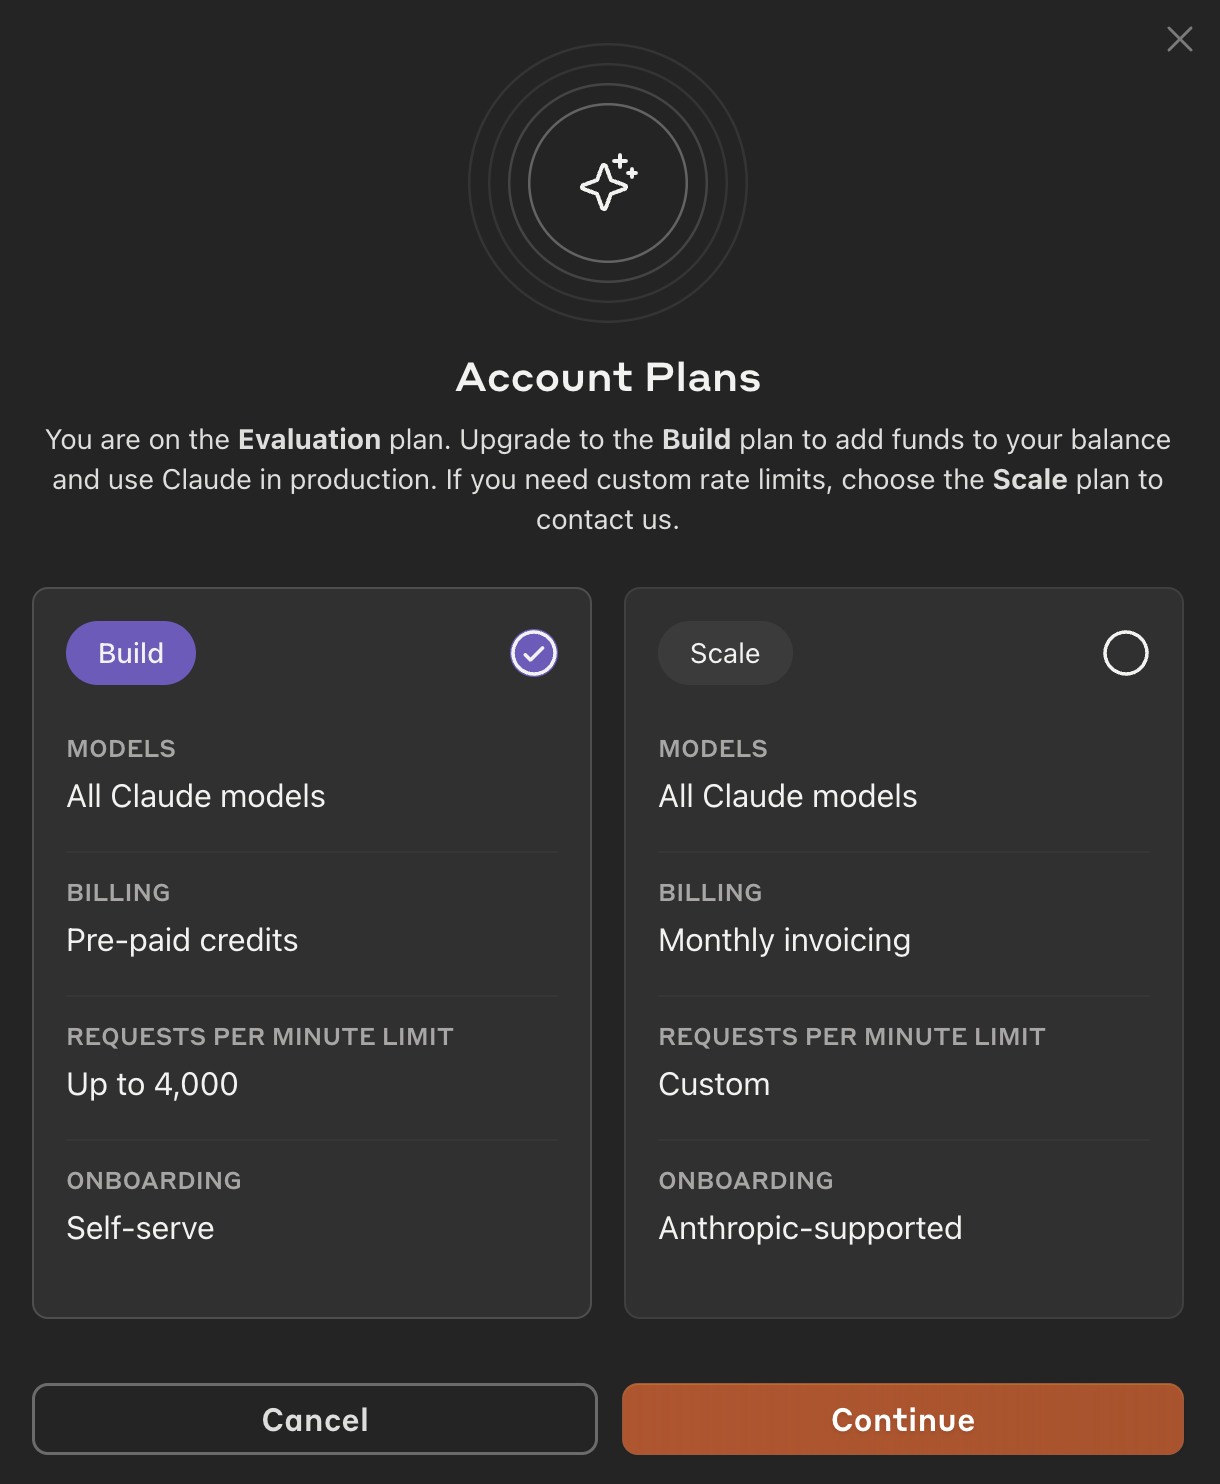
Once you have issued an API key, you can use it by charging a usage fee. From the “Plans & Billing” menu, you can select a billing plan and charge credits.
When the author first created an account and API key, it was in an “Evaluation” plan trial mode, and $5 worth of credit was provided for free.
You can continue to use it for free until you use up the $5.
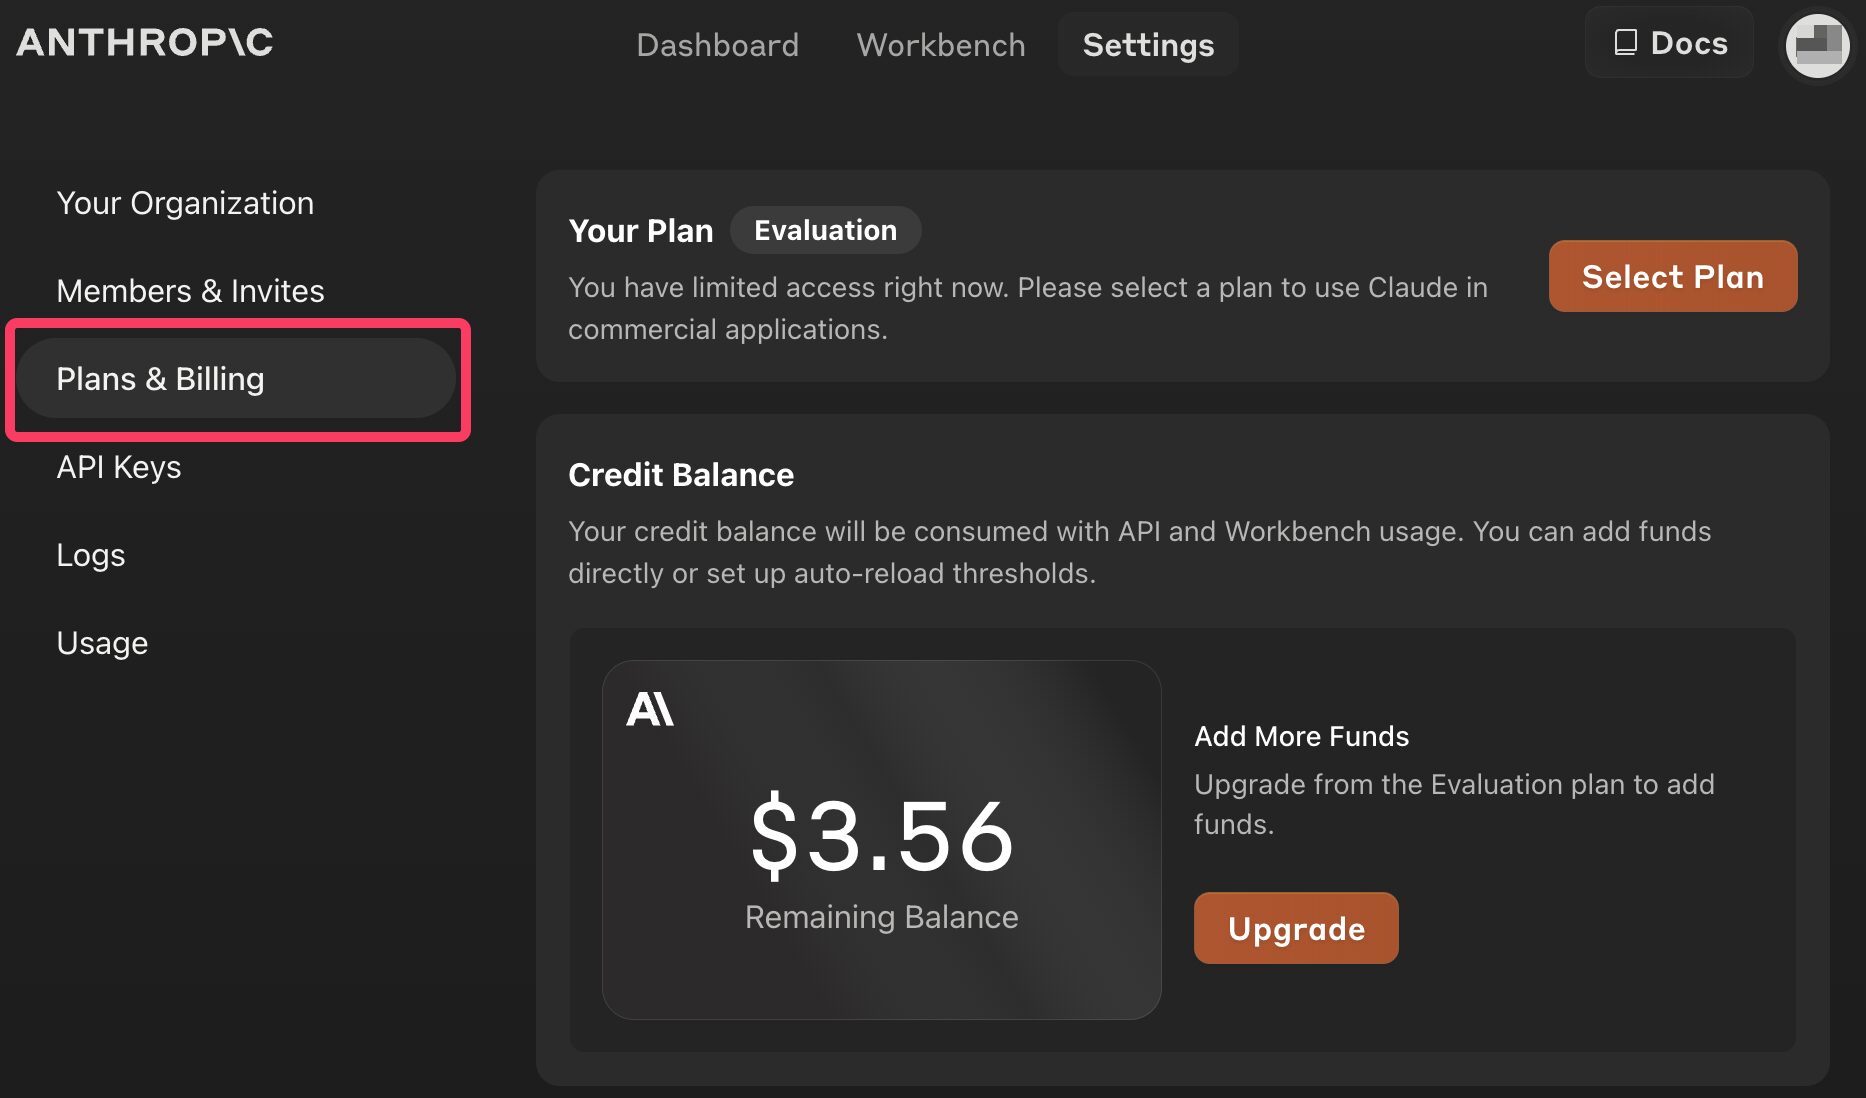
Once you have used up the $5 provided in the Evaluation plan, you will basically need to upgrade to the “Build” plan, which is a prepaid billing plan.
There is no fixed monthly payment, and it is a prepaid plan where you charge only the credits you need.
It allows for 4,000 requests per minute, and unless you are using the API for large-scale application development, the Build plan should be sufficient for chatting purposes.
How Much Does It Cost to Use the API Key?
Opus, the top-tier model of Claude 3, is more expensive than lower models like Haiku and Sonnet, but still has the following pricing:
- 1 million input tokens: $15
- 1 million output tokens: $75
It’s hard to imagine what 1 million tokens means, so let’s consider it in terms of 1,000 tokens. For 1,000 tokens, it would be $0.015 for input and $0.075 for output.
1,000 tokens is roughly equivalent to 750 words in English.
With a subscription, you would pay $20 per month regardless of usage, but it’s quite difficult to input and output $20 worth in a month using an API key.
Furthermore, if you were to use ChatGPT, Claude 3, Gemini Pro, etc. in combination, it’s unlikely that you would use that much chat unless you are a very heavy user, so using an API key with pay-as-you-go billing seems much more cost-effective than a subscription.
How to Use the Browser-based Chatbot UI
Once you have your API keys ready, it’s time to introduce how to use the browser-based version of Chatbot UI.
First, access the Official Hosted Version top page of Chatbot UI and register your email address (Sign Up).
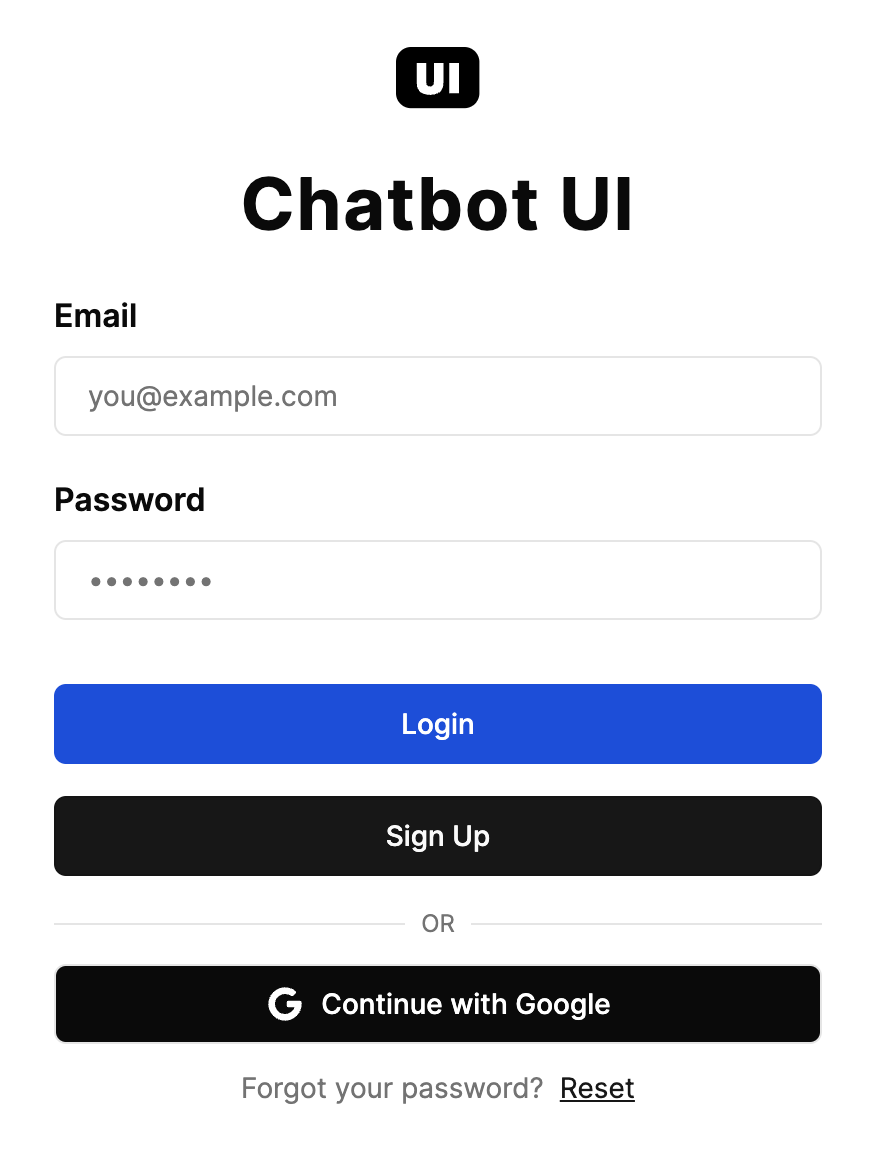
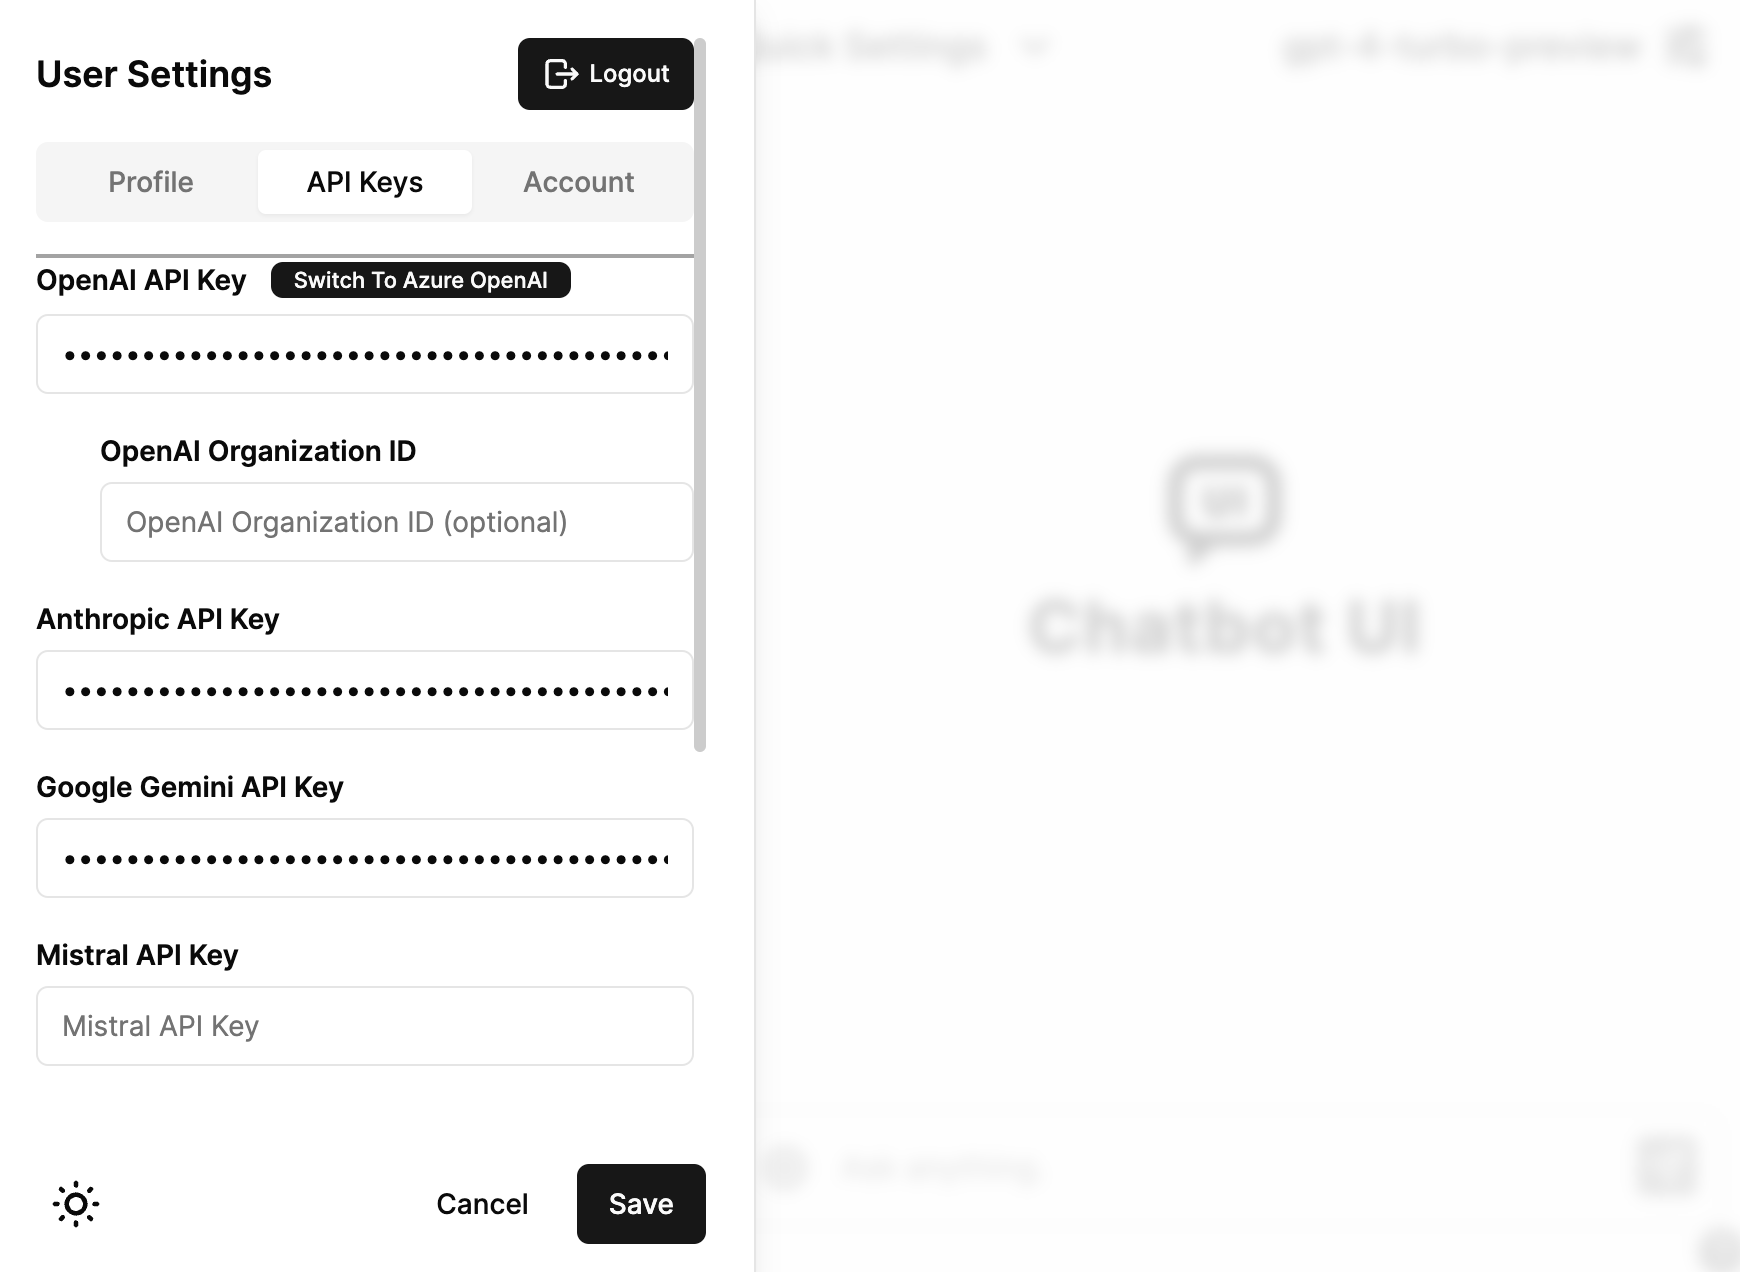
Upon registration, you will immediately see a screen where you can register the API keys you own.
Here, you can register the API key for using OpenAI’s GPT-4 and the aforementioned API key for Anthropic’s Claude. In addition to these, it also supports a range of famous models such as Google’s Gemini, X (Twitter)’s Groq, Perplexity, and Mistral.
You only need to enter the API keys you plan to use. The author has issued API keys for OpenAI, Anthropic, and Google, making GPT-4, Claude 3, and Gemini Pro all available for use.
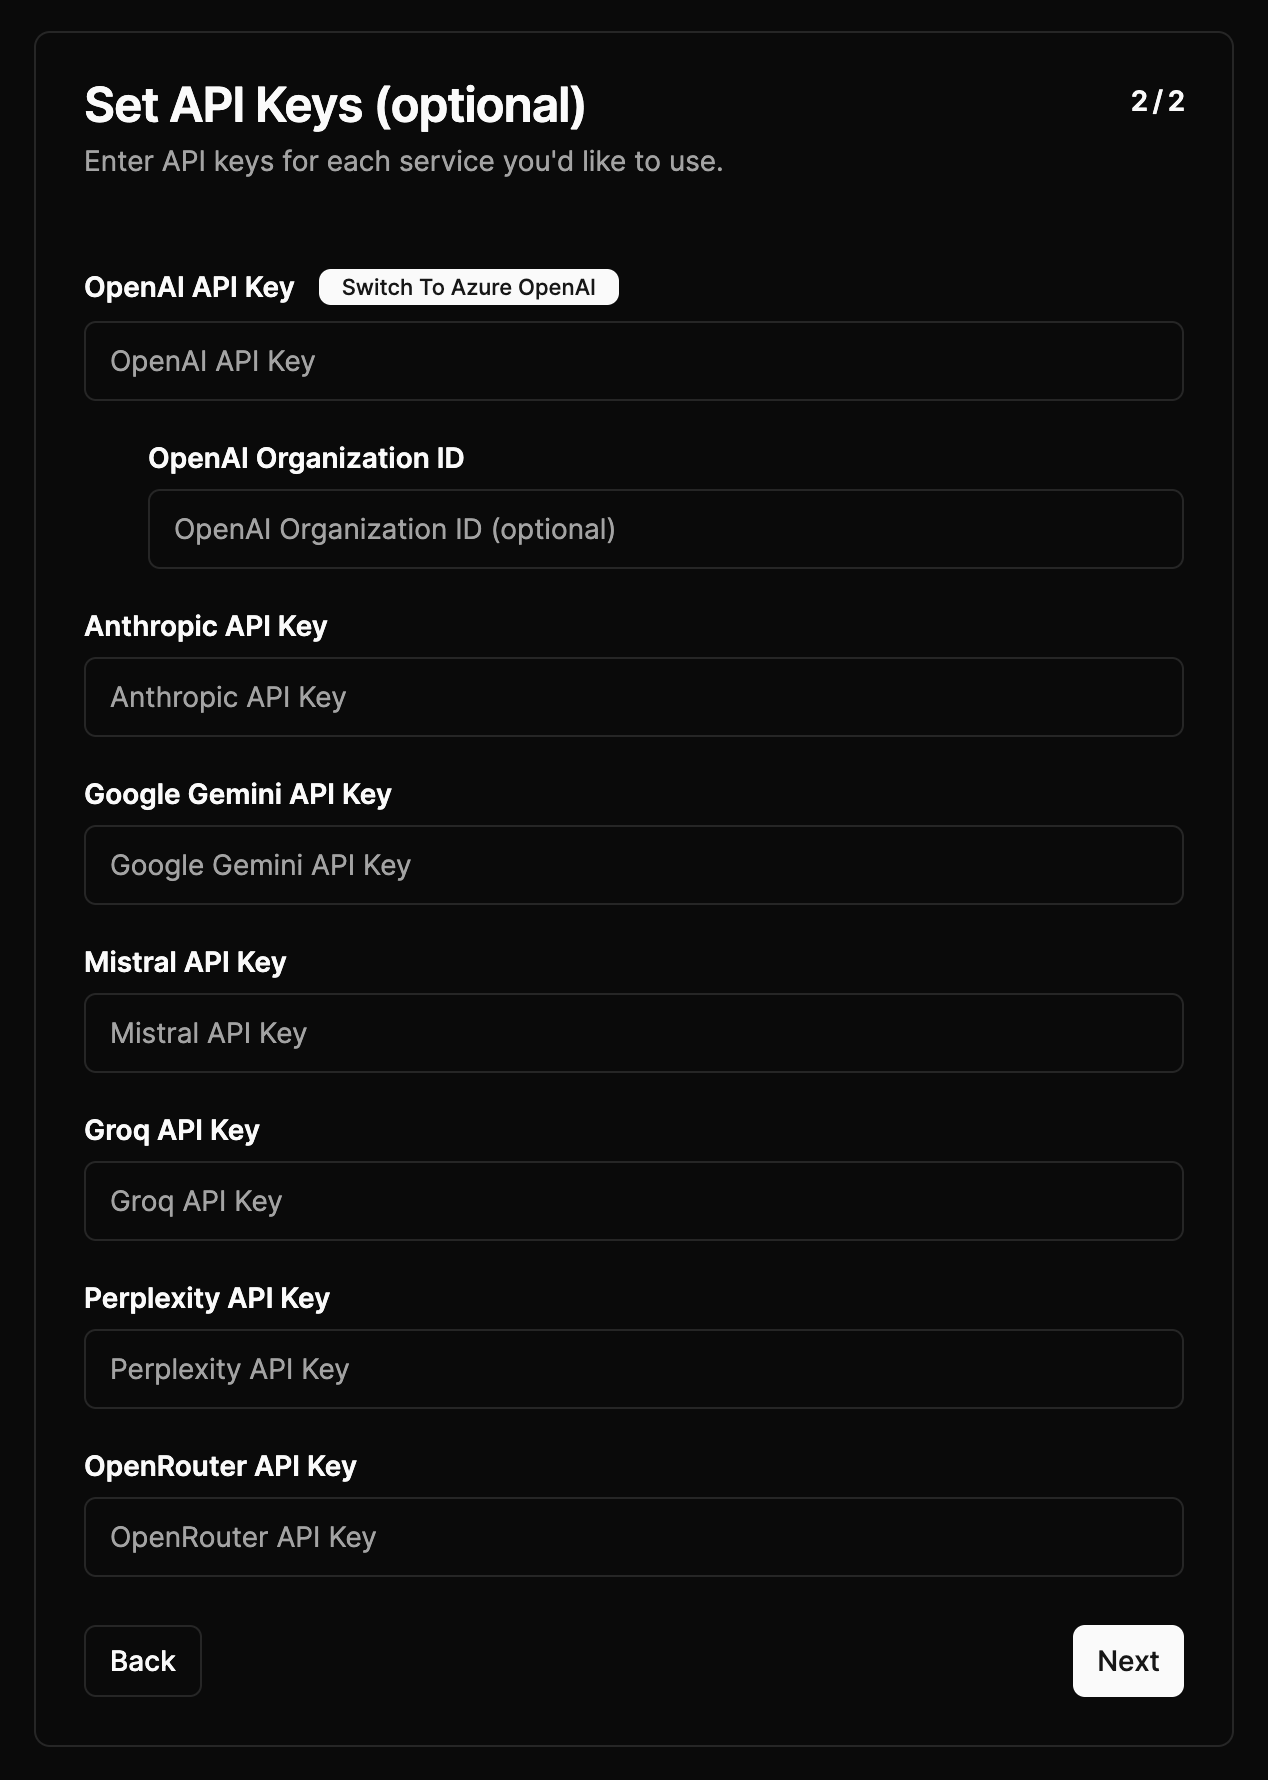
Rest assured that you can add or change API keys anytime by opening the user settings in Chatbot UI, not just during the initial registration.
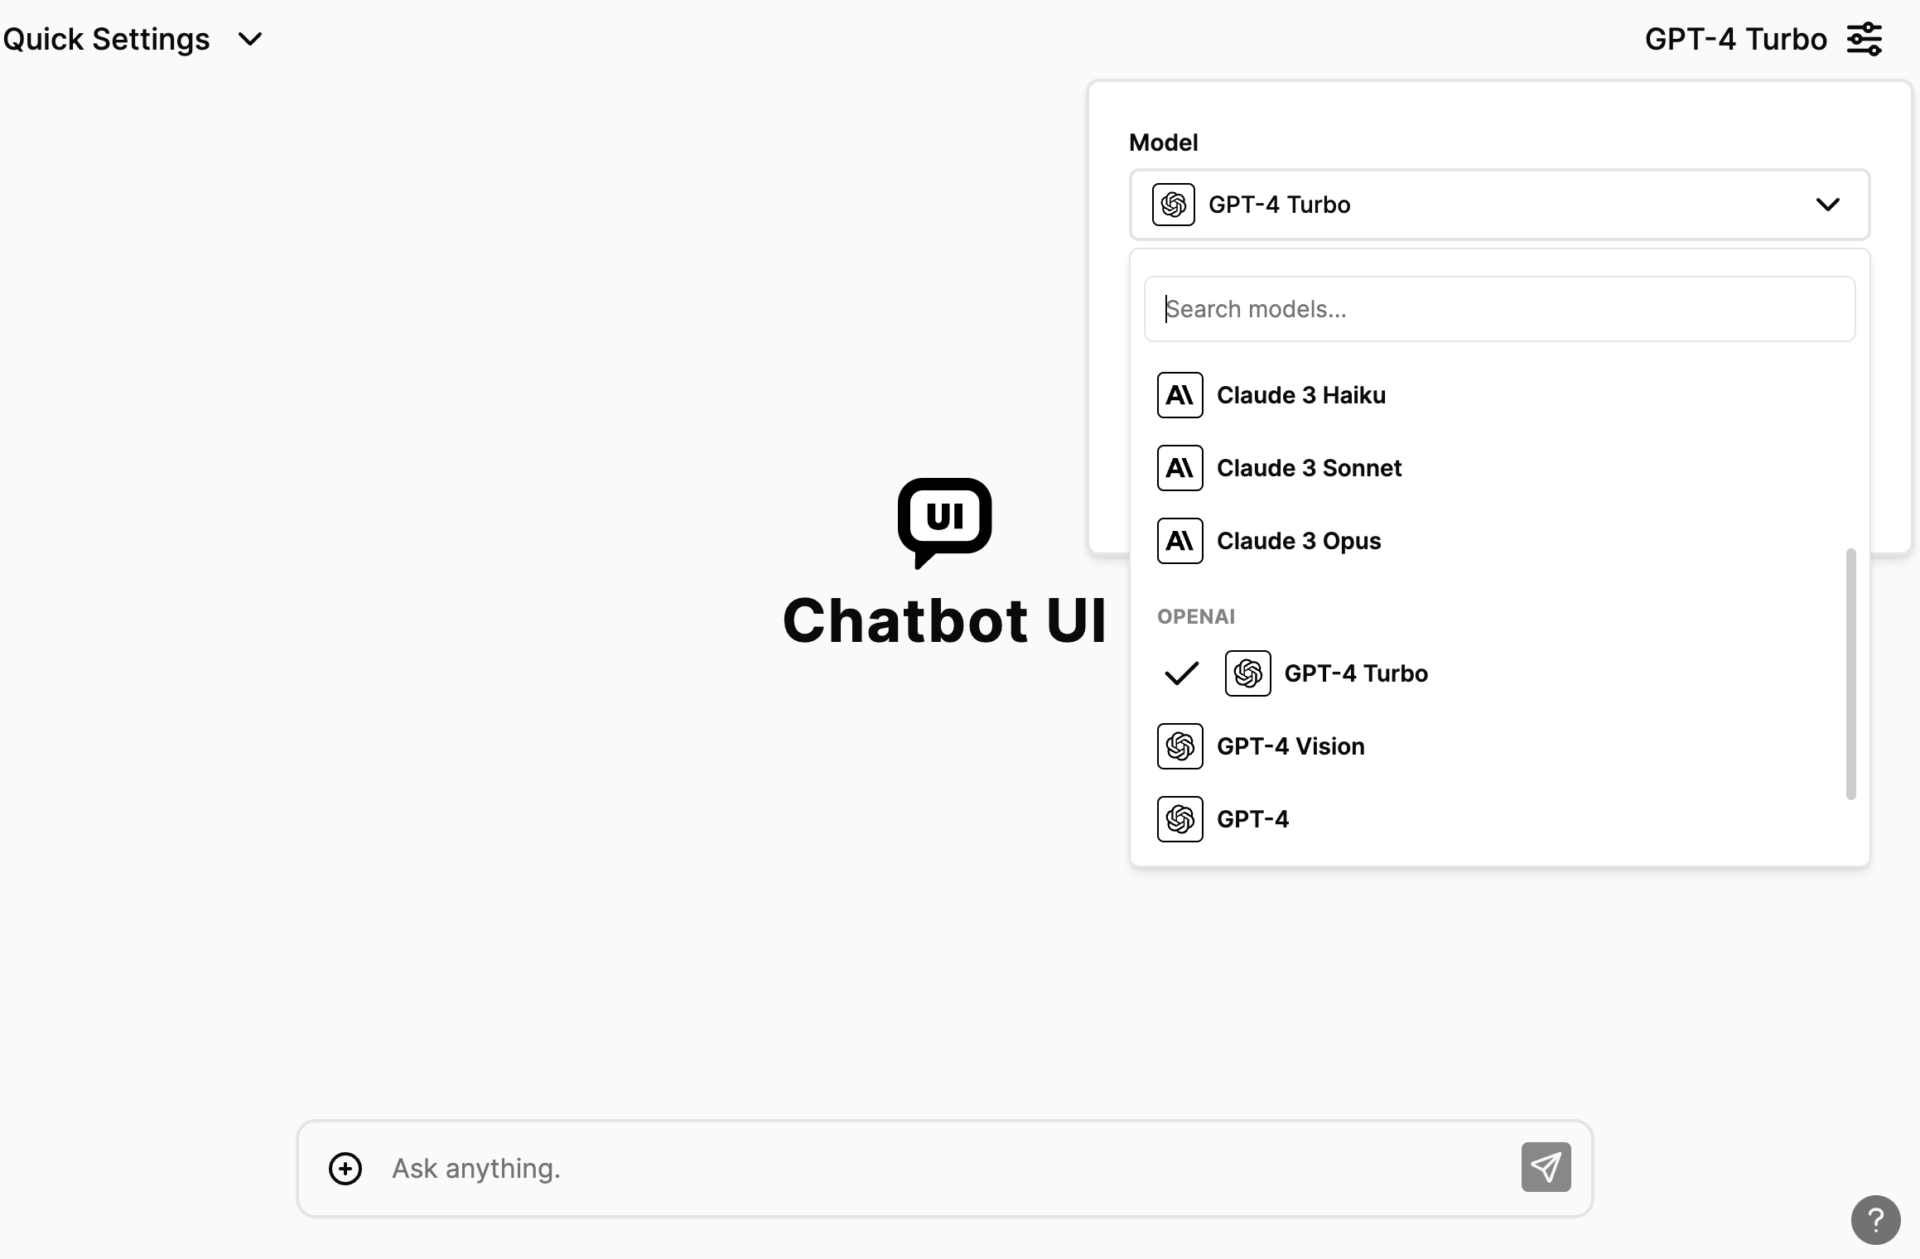
For models with API keys entered, you can select the model from the top right corner when creating a new chat by clicking the “New Chat” button in Chatbot UI.
In the author’s account, since the Anthropic API key is registered, Claude 3’s Opus, Sonnet, and Haiku can be easily called. Furthermore, thanks to the registered OpenAI API key, even GPT-4 Turbo, GPT 3.5 Turbo, and the GPT-4 Vision model that supports image input can be called.
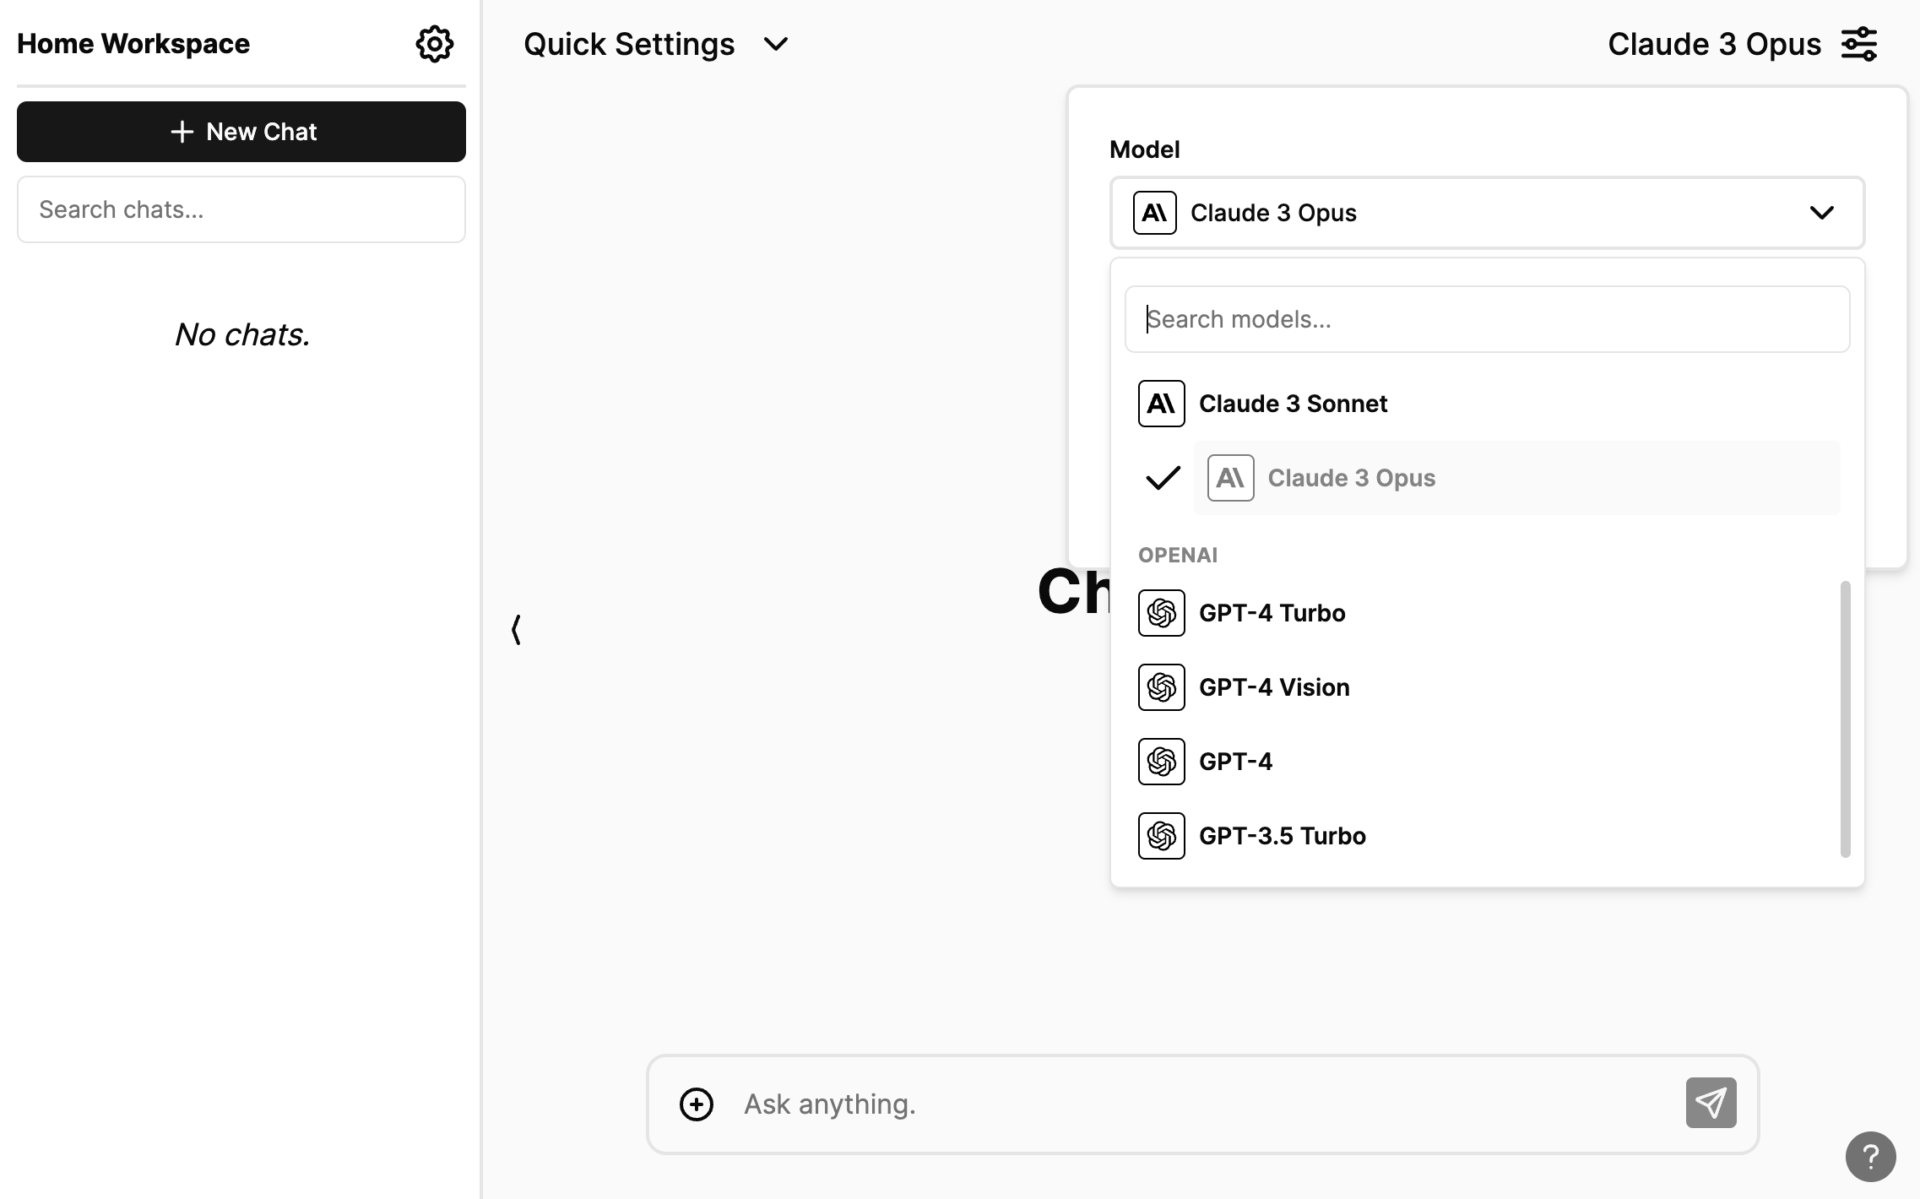
It is extremely convenient to be able to select the optimal model for each task and immediately call your favorite LLM.
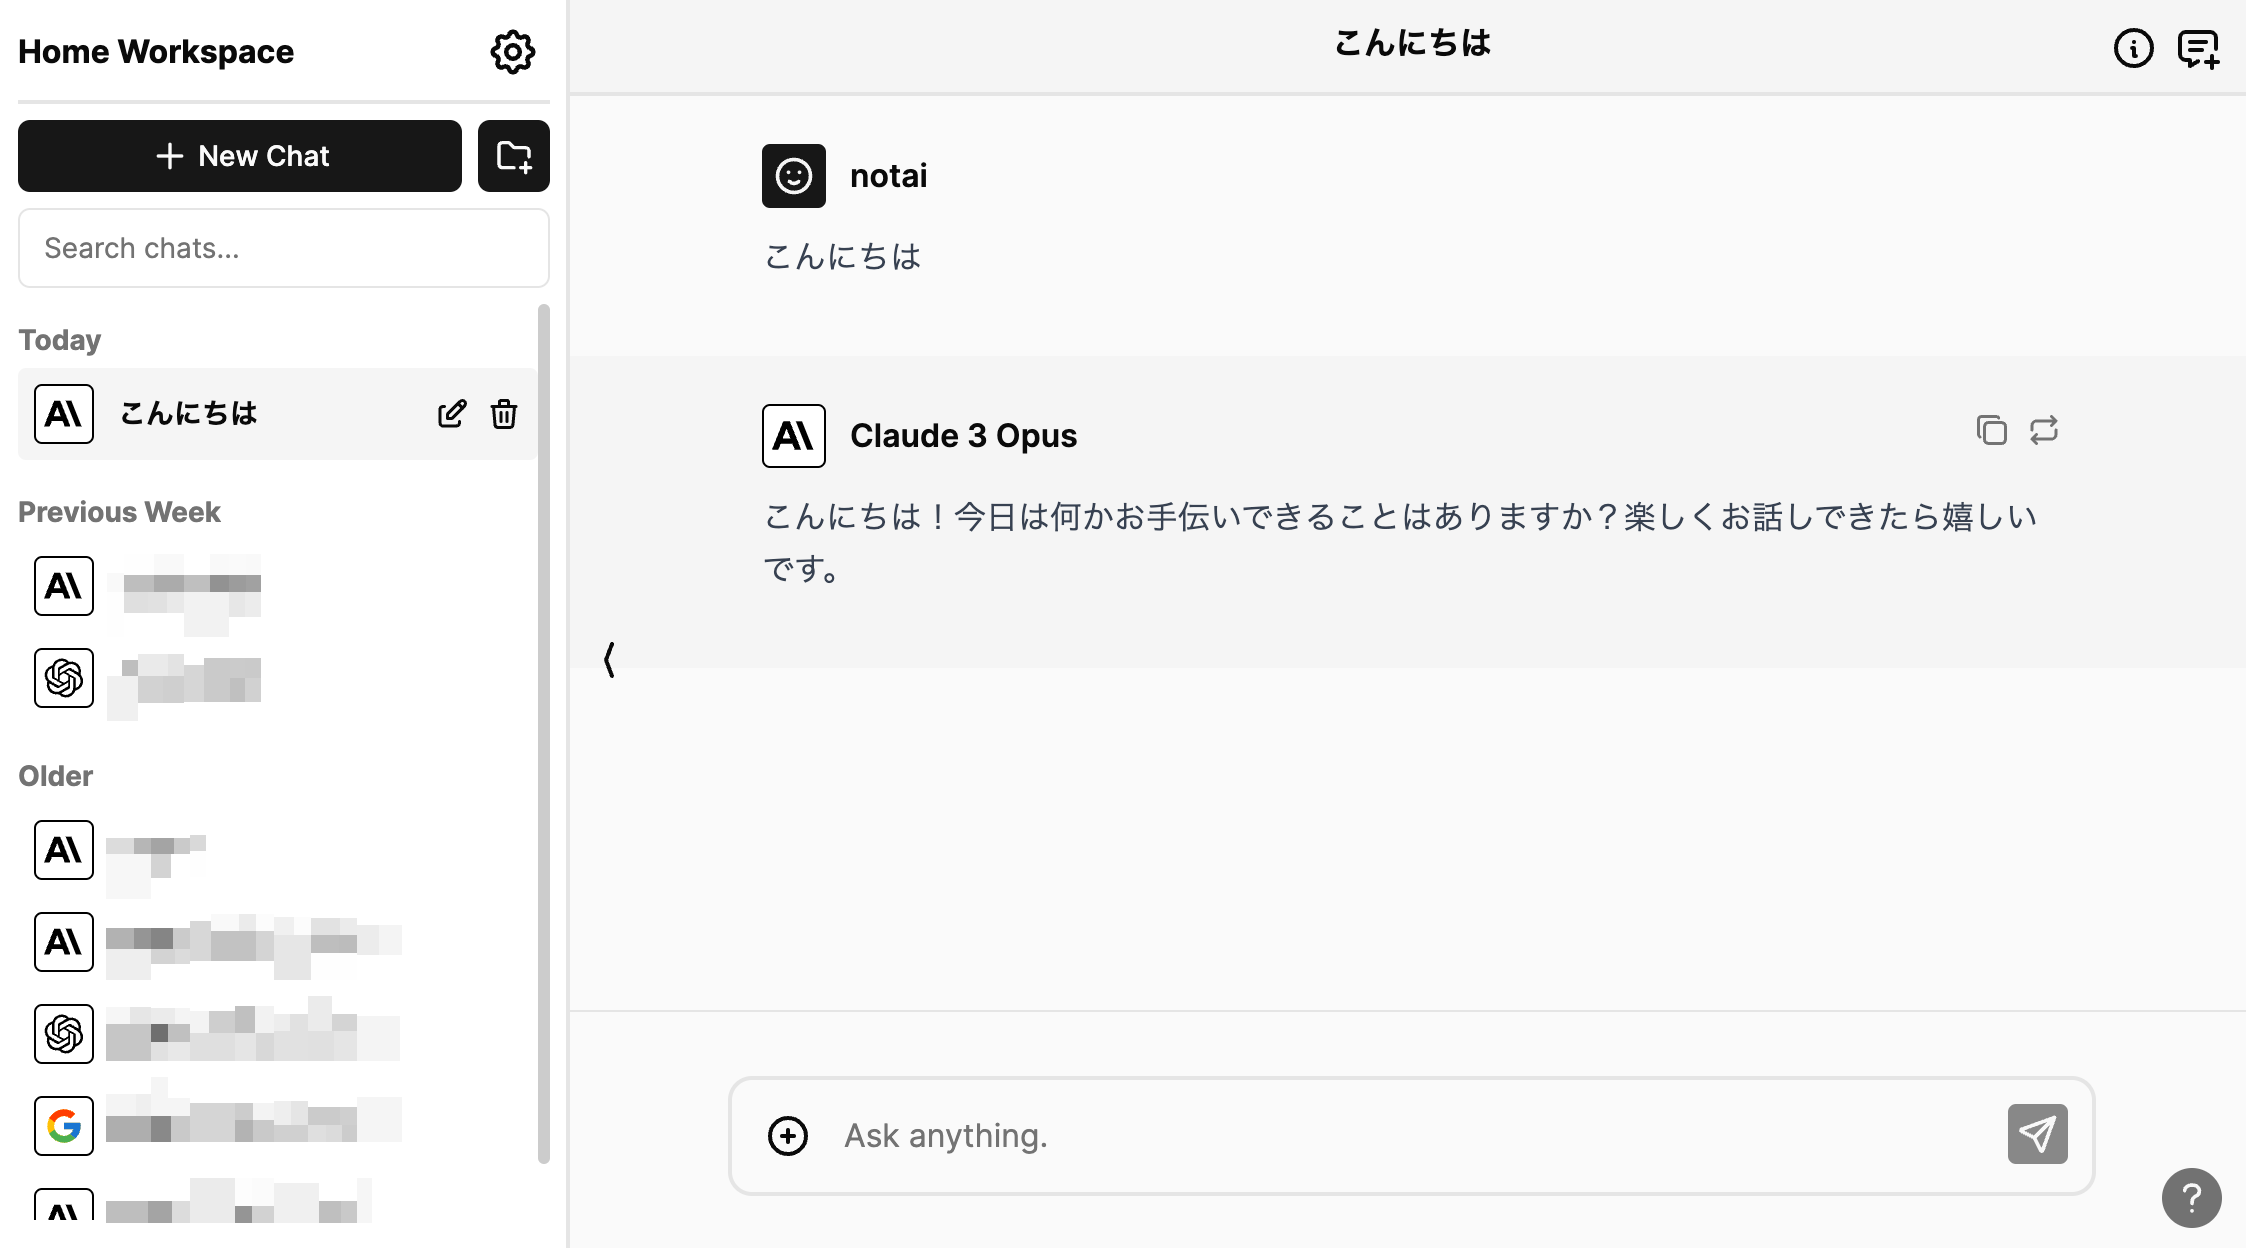
The chat interface is also responsive, offering an experience almost identical to using the browser versions of ChatGPT or Claude 3 with a subscription.
Unfortunately, the free plan of the browser version does not allow attaching files or images, but you can still use the latest models like GPT-4 and Claude 3 Opus for chatting without subscribing to the $20 monthly plan, so definitely give it a try.
Using Chatbot UI in a Local Mac Environment
Chatbot UI’s local version can run smoothly even on Apple Silicon-equipped Mac Book Airs and other Macs.
The detailed steps of the installation procedure may change due to app updates and other factors, so please check the latest installation method on the Github page of the developer, Mckay Wrigley.
It can be started relatively easily by just cloning the Github repository, installing Docker and Supabase, so even those who are not very familiar with programming can manage if they can use Git Clone and Homebrew in the Mac terminal.
Here, we will roughly explain the process when the author installed Chatbot UI on a newly purchased Mac Book Air.
Installing Homebrew
Homebrew is a package manager for MacOS that allows you to easily install various programs using terminal commands. If you have never used it before, you need to install Homebrew by entering the following installation command found on the Homebrew official page into the terminal.
/bin/bash -c "$(curl -fsSL https://raw.githubusercontent.com/Homebrew/install/HEAD/install.sh)"
After the Homebrew installation is complete, don’t forget to execute the command to set the PATH displayed in bold as “Next Step” in the terminal.
Installing Node.js and Docker
Now that Homebrew is available, install Node.js using the brew command.
brew install node
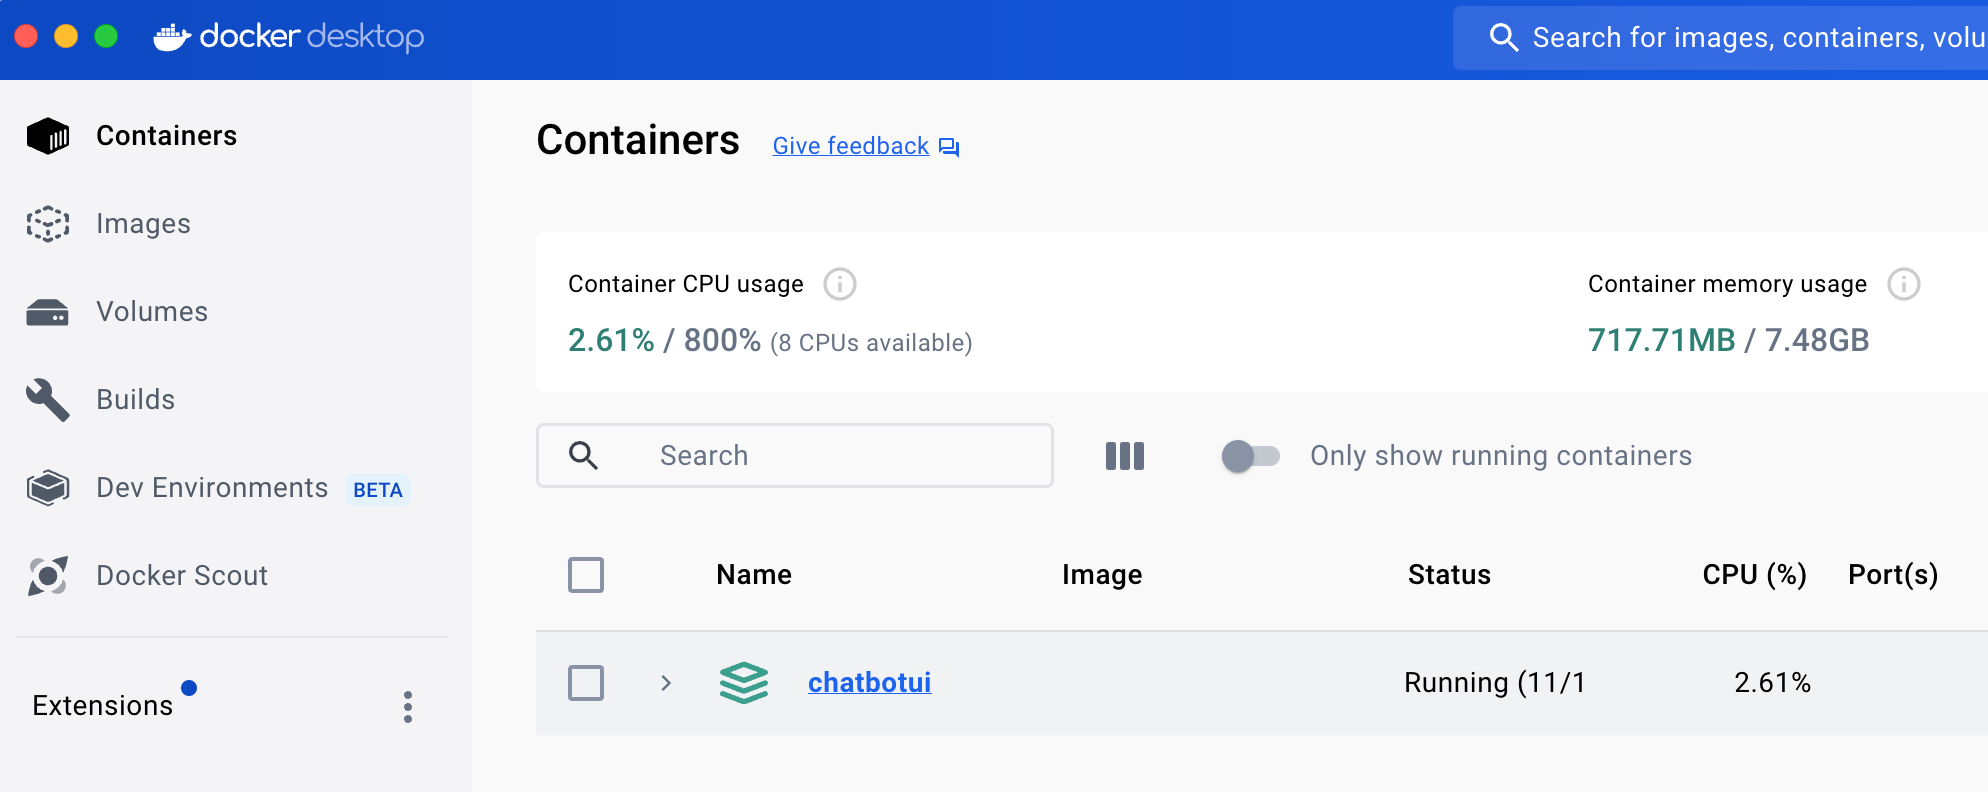
Also, since Docker is required to run Supabase, download Docker Desktop for Mac.
Installing Chatbot UI
With most of the preparations done, copy the Chatbot UI Github repository to your home directory using the Git Clone command.
git clone https://github.com/mckaywrigley/chatbot-ui.git
A folder named chatbot-ui will be created in your home directory, and files will be downloaded into it.
Next, move to the chatbot-ui folder created earlier using the cd command and install the Dependencies all at once.
npm install
Then, install Supabase using the brew command.
brew install supabase/tap/supabase
Once the Supabase installation is complete, execute the following command in the chatbot-ui folder to start Supabase.
supabase start
It takes some time for the initial startup, but if you open the Docker Desktop app, you can see that Supabase containers are automatically starting up one after another.
Next, set the environment variables.
Run cp .env.local.example .env.local to create a .env.local file in the chatbot-ui folder. You need to copy various Supabase information into this file. In the terminal, execute the command:
supabase status
The necessary information such as Supabase authentication information will be displayed as follows.
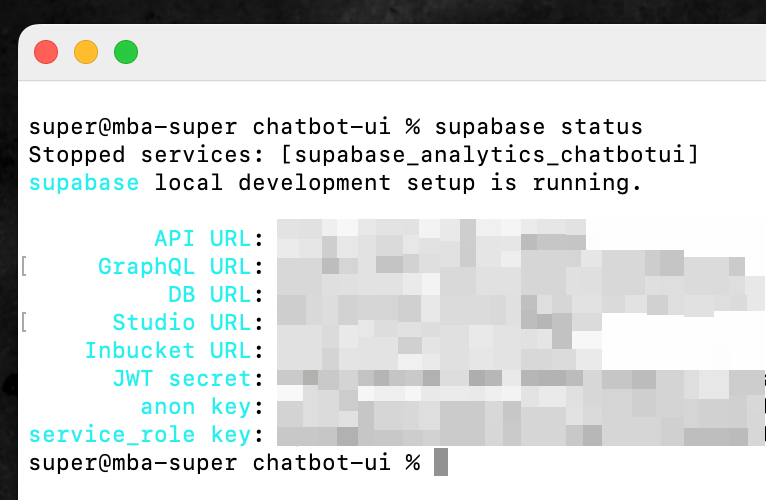
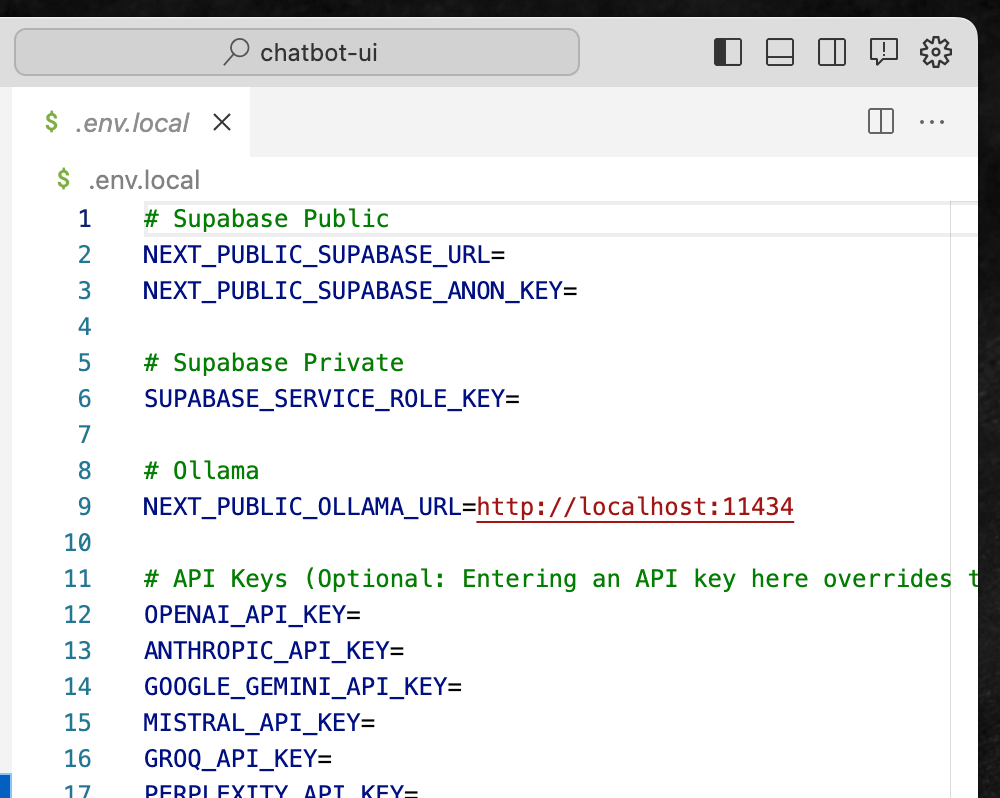
Open the .env.local file created earlier with a text editor, and you will see places to copy these Supabase information and enter API keys for LLMs such as GPT-4 and Claude, so fill them in.
- For
NEXT_PUBLIC_SUPABASE_URL, use the “API URL” from status - For
NEXT_PUBLIC_SUPABASE_ANON_KEY, use the “anon key” from status - For
SUPABASE_SERVICE_ROLE_KEY, use the “service_role key” from status
Other items can be left blank, and you can enter API keys etc. after launching the app to get it working for the time being.
Also, it seems that the SQL database settings in the chatbot-ui folder need to be checked.
In the author’s case, no changes were necessary, but open the file located at chatbot-ui/supabase/migrations/20240108234540_setup.sql with a text editor and check that the service_role key written on line 54 matches the one displayed in the status earlier.
Launching Chatbot UI
Once you have completed up to this point, simply enter the following command in the terminal in the chatbot-ui directory to launch Chatbot UI.
npm run chat
If the command works correctly, open the following URL to display the user interface of Chatbot UI running locally.
http://localhost:3000
Also, all message history etc. is stored locally, and the backend can also be viewed at the following URL.
http://localhost:54323/project/default/editor
Using Claude 3 and GPT-4 in Chatbot UI on a Local Mac Environment
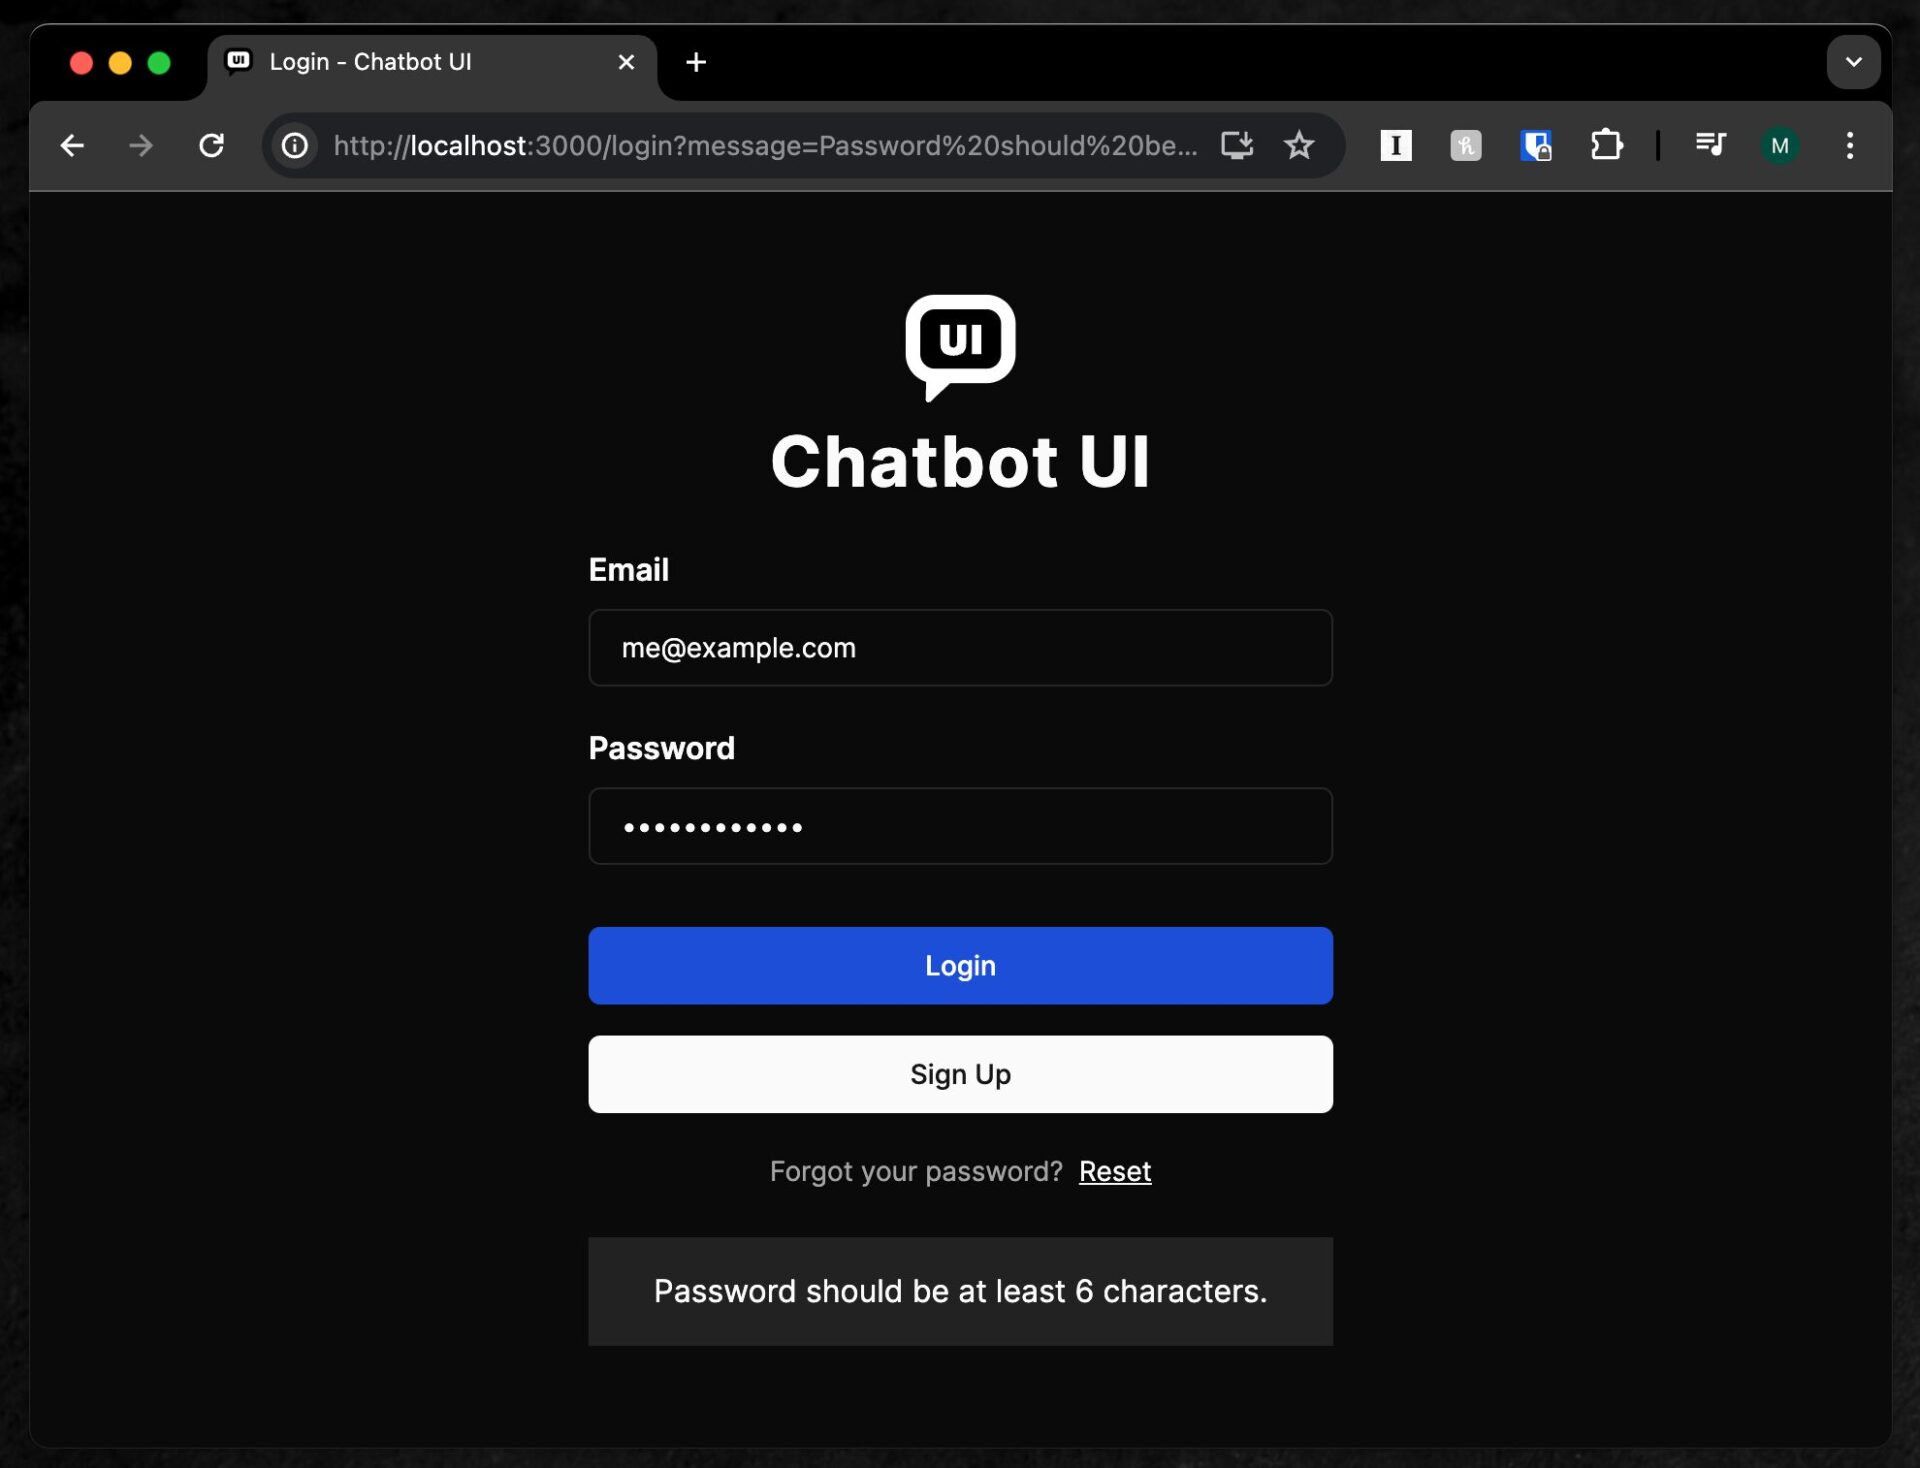
When launched with the npm run chat command and the UI is opened locally, a login screen is displayed at first.
Originally, it is intended to be used in a way that creates accounts for each user when running on a server and having users in a school or company use it.
Here, since you are only running it on your own PC for yourself, you can start using it by entering any random address and password and clicking “Sign Up”.
However, since chat history etc. is saved tied to the user, it may be easier to understand later if you seriously register your own real email address etc.
Once the username creation is complete, you will be taken to a screen where you can set API keys.
If you have entered the API keys in the .env.local file created earlier, the API keys entered in the .env.local file will take precedence over the API keys entered here.
Here, as with the browser version, you can enter the API keys of the LLM models you want to use.
The author often uses OpenAI, Anthropic, and Google, so he set up API keys for them.
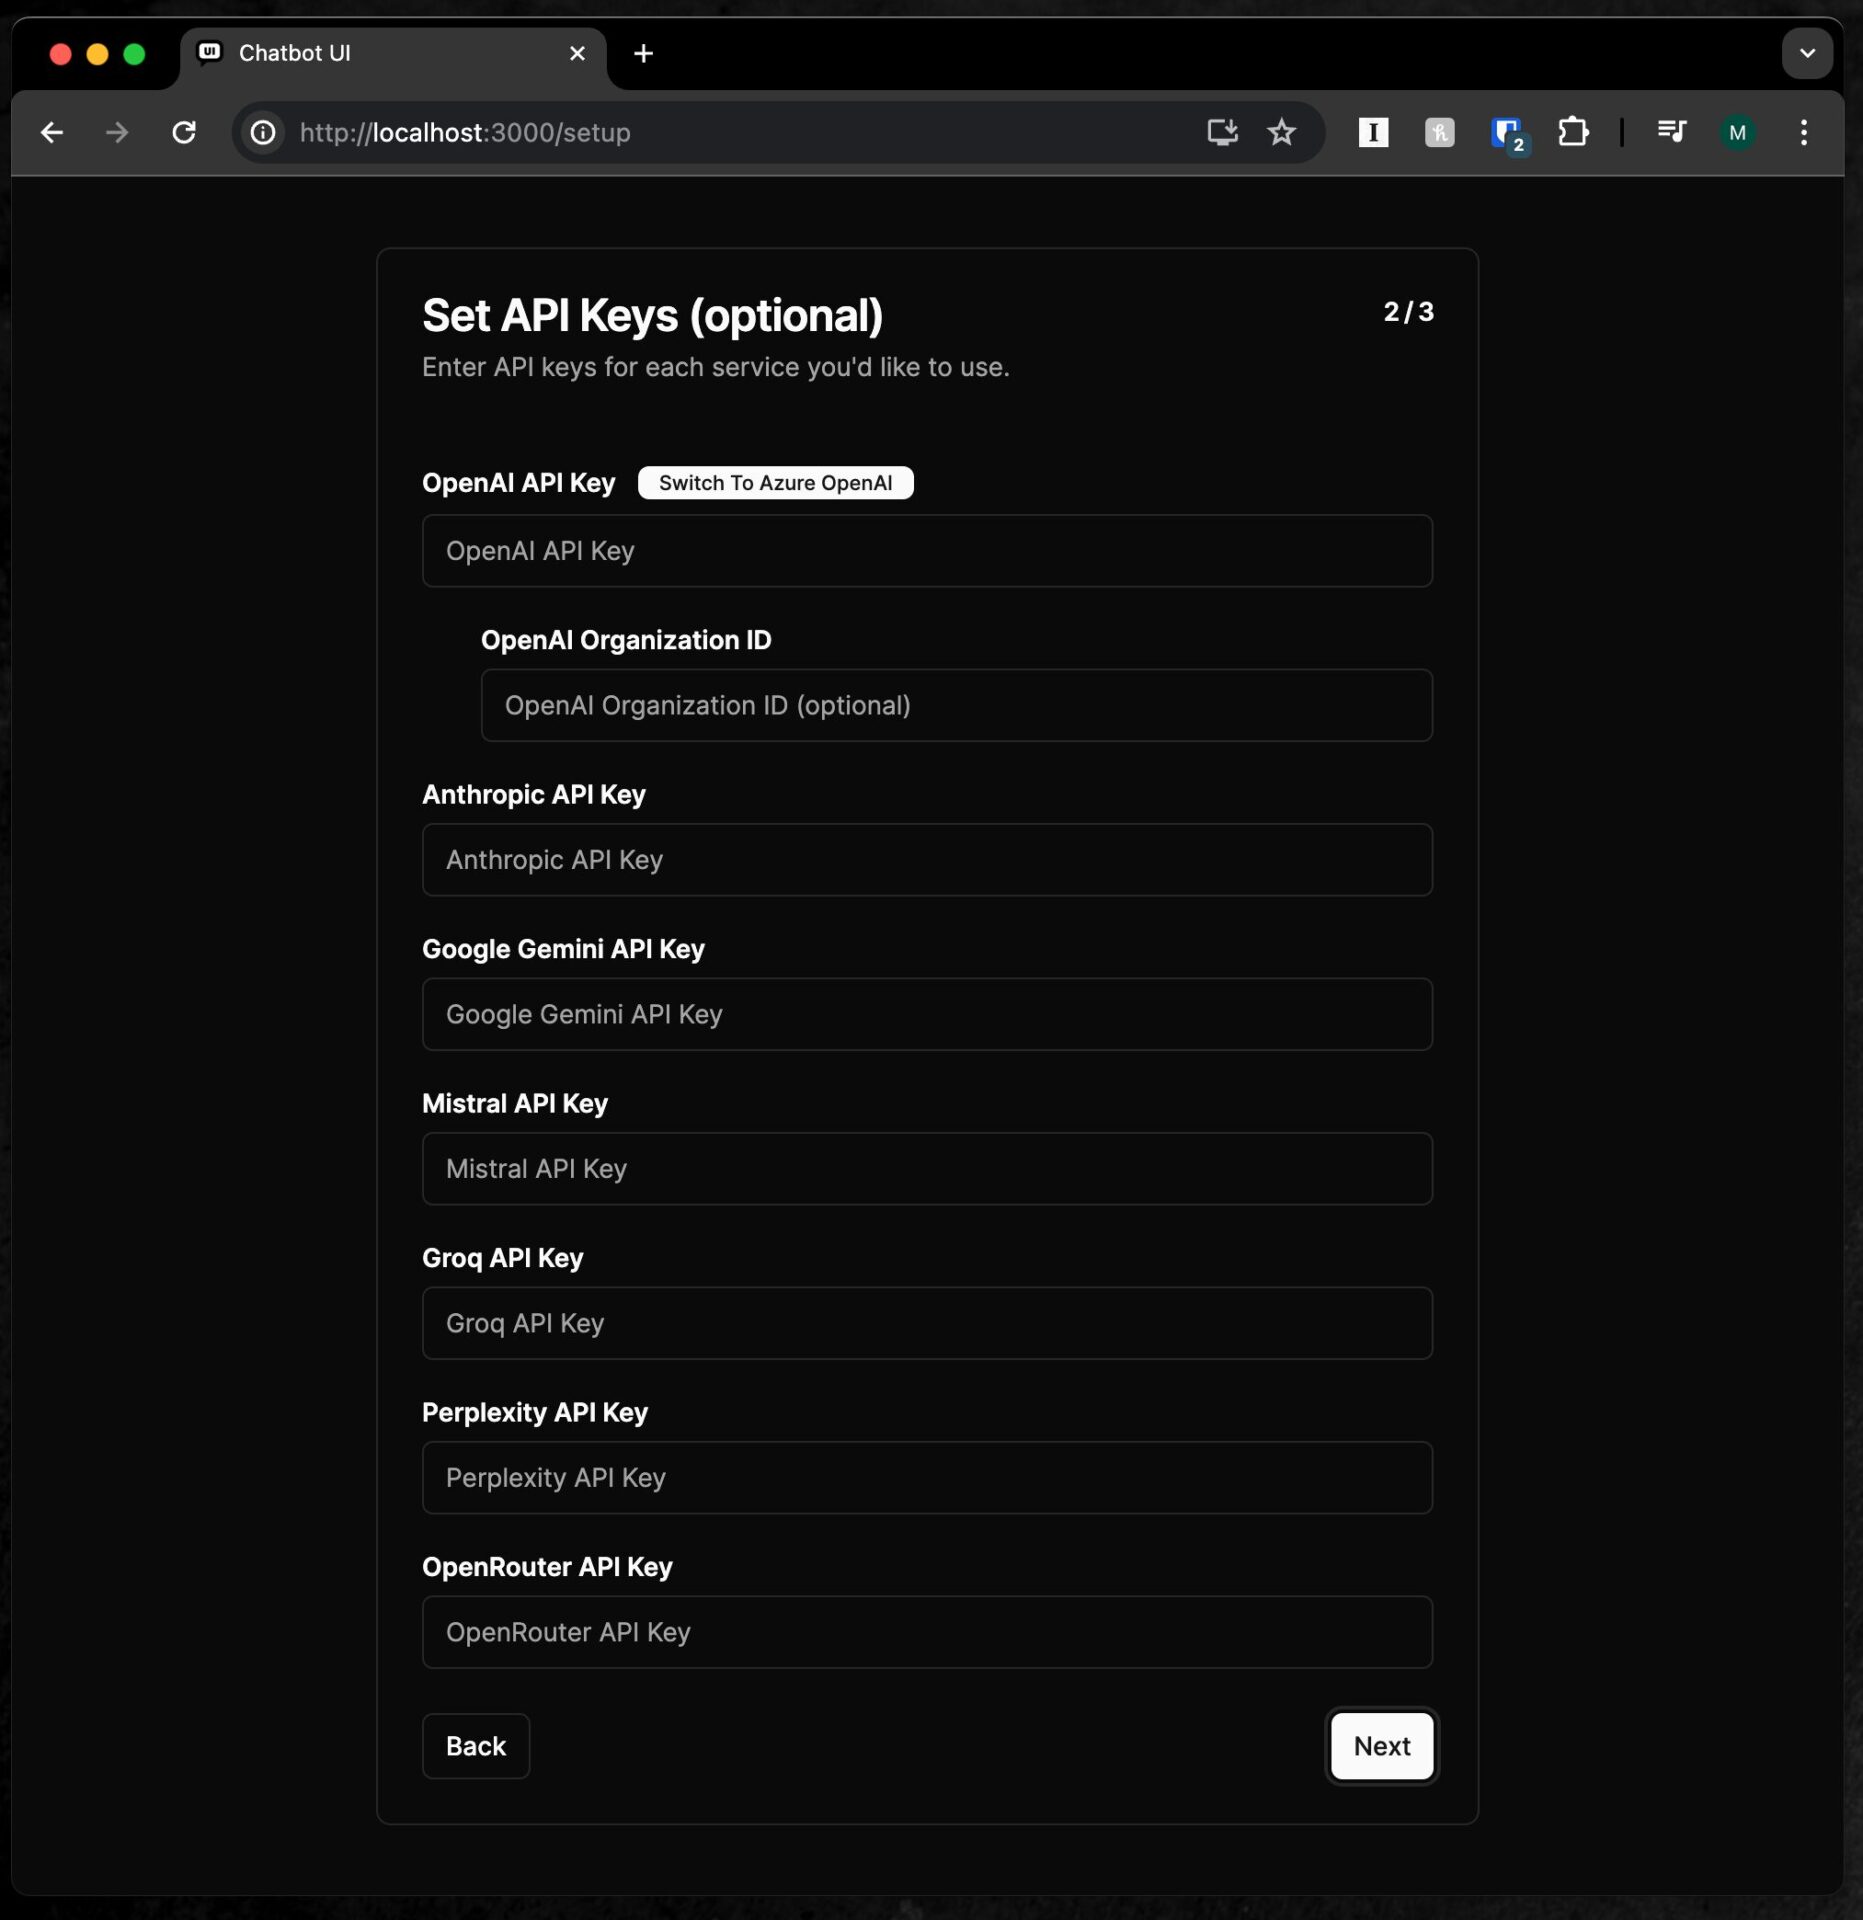
Once you enter the API keys, the large language models that can be used with those keys can be selected from the dropdown menu in the upper right.

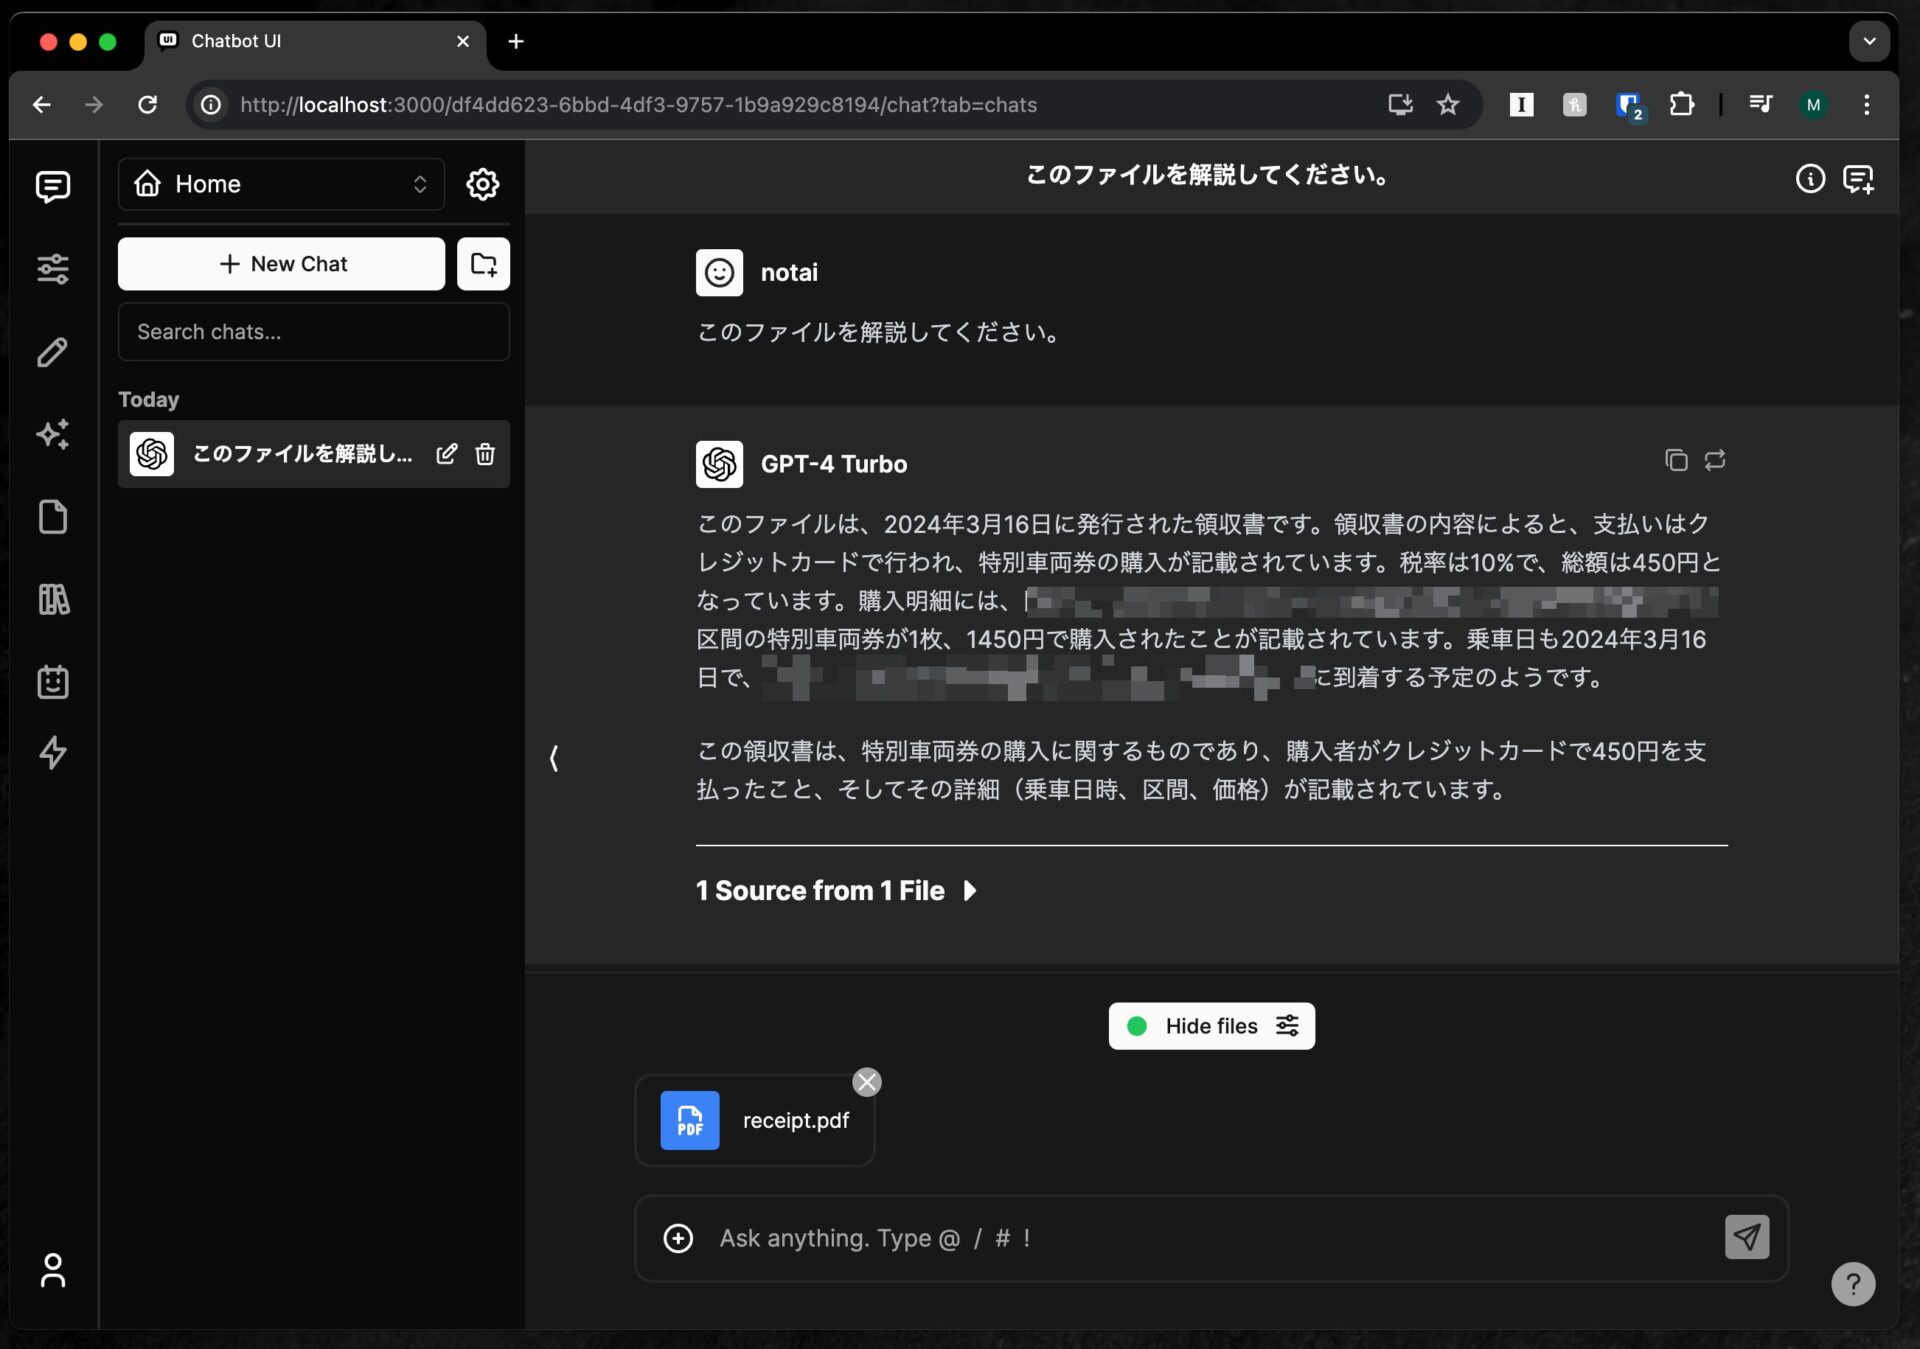
It also supports file uploads, which were not available in the free plan of the browser version.
For example, when a local PDF file is uploaded to GPT-4 Turbo, it accurately reads the contents of the file and provides an answer.
It features a “preset” function that combines a specific model with a specific system prompt to customize it to behave to your liking, a function to save frequently used prompts as templates, and a function to upload files and have large language models reference them.
It’s exciting that all the features that cost $8 per month in the browser version are available for free in the local version.
With new AI models appearing one after another, Chatbot UI immediately supported Claude 3 Opus right after its release, making it the best application for trying out the latest AI.
Even without a monthly subscription, some of the features built into ChatGPT and Claude 3, such as uploading images and files, can be reproduced in Chatbot UI, making it an optimal tool for sampling the latest models while keeping usage costs down.