
Meta (Facebook) has released a new “Llama 3” model on April 19, 2024, as part of their open-source generative AI model series called “Llama”.
Unlike OpenAI’s GPT-4 or Anthropic’s Claude 3, Llama models are publicly available, allowing anyone to download and use them on their own PC/Mac, even without an internet connection.
The recently released Llama 3 comes in two versions: 8B (8 billion) parameters and 70B (70 billion parameters).
According to several benchmarks, the large 70B model, while not as capable as OpenAI’s top model GPT-4 Turbo or Anthropic’s top model Claude 3 Opus, generates better responses than GPT-3.5, Claude 3 Sonnet, and Gemini 1.5 Pro.
Meta has also announced plans to release an even larger model, Llama 3 400B, which is currently in training. With the 70B model already approaching the performance of GPT-4 and Opus, the arrival of the 400B model is highly anticipated.
The lightweight Llama 3 8B model can run at a practical speed on Mac Book Air/Pro with Apple Silicon chips like M1, M2, and M3.
Given that the models are open-source, there’s no reason not to try running them on your own Mac.
This article provides a detailed explanation of how to download Llama 3 on a local PC/Mac and use it with a chat-style UI, even in an offline state without an internet connection.
The author is using an M3 Mac Book Air with 16GB of memory. For Mac users with Apple Silicon, the same steps should work for the Llama 3 8B model.
Using generative AI in a local environment has the advantages of no usage fees and the ability to use sensitive data like personal or confidential information without worry, as no data is sent externally.
The guide is written in an easy-to-follow manner so that even those without programming knowledge can easily replicate the steps.
Easy Access to Local Models with “Ollama”
“Ollama” is an open-source tool that allows easy execution of large language models (LLMs) in a local environment. It enables running AI models in just a few steps, even without specialized knowledge in programming or machine learning.
Since the models run on a local PC, chat data is not sent to the cloud.
The installation process and usage are very simple, with the ability to download and run representative open-source generative AI models like Llama 3 and Mistral with a single command.
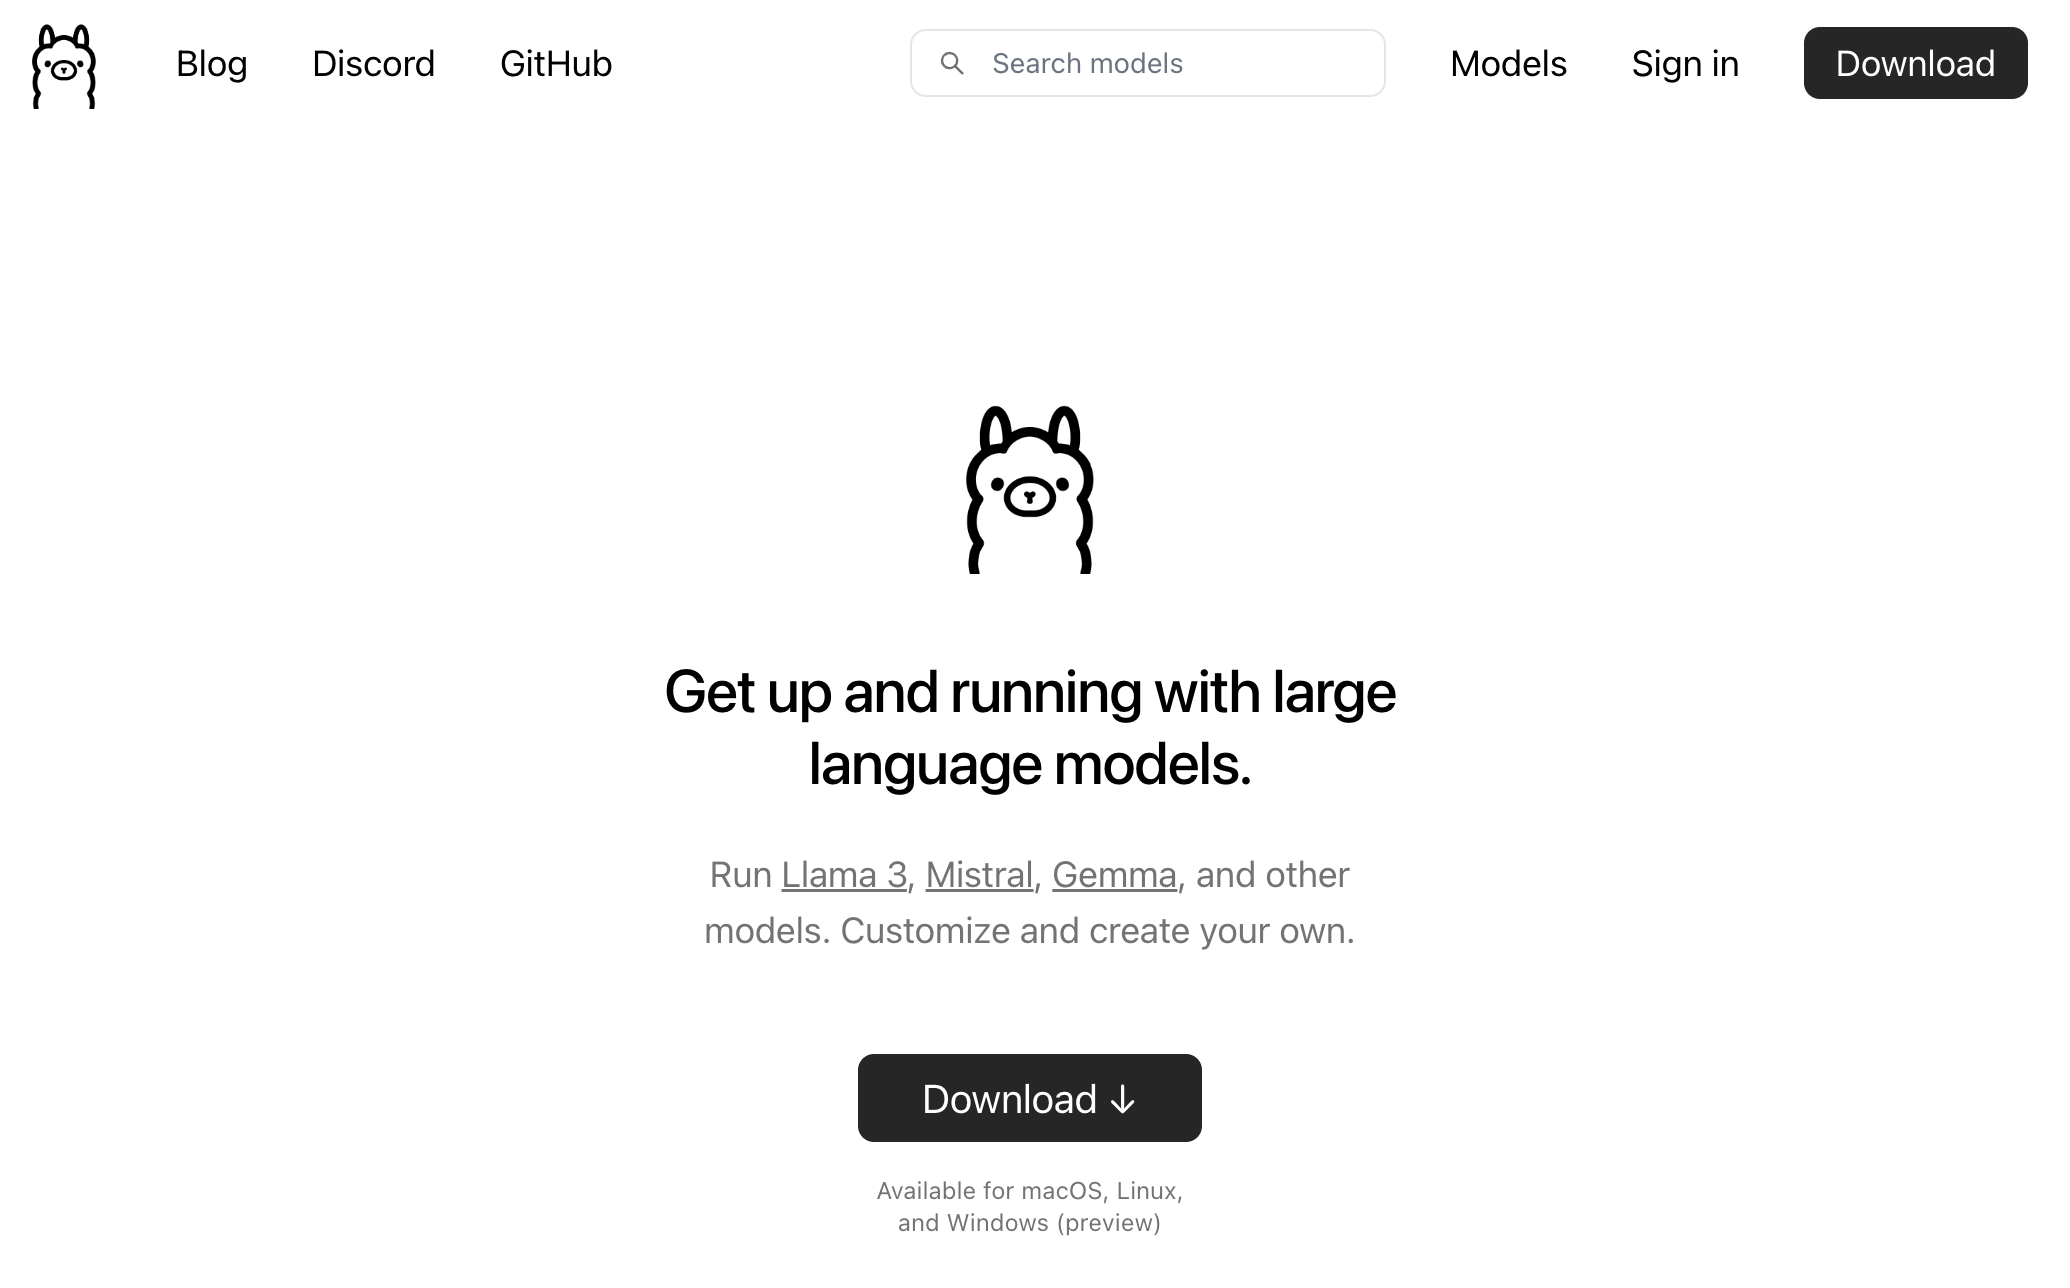
First, access the official Ollama website and download the app.
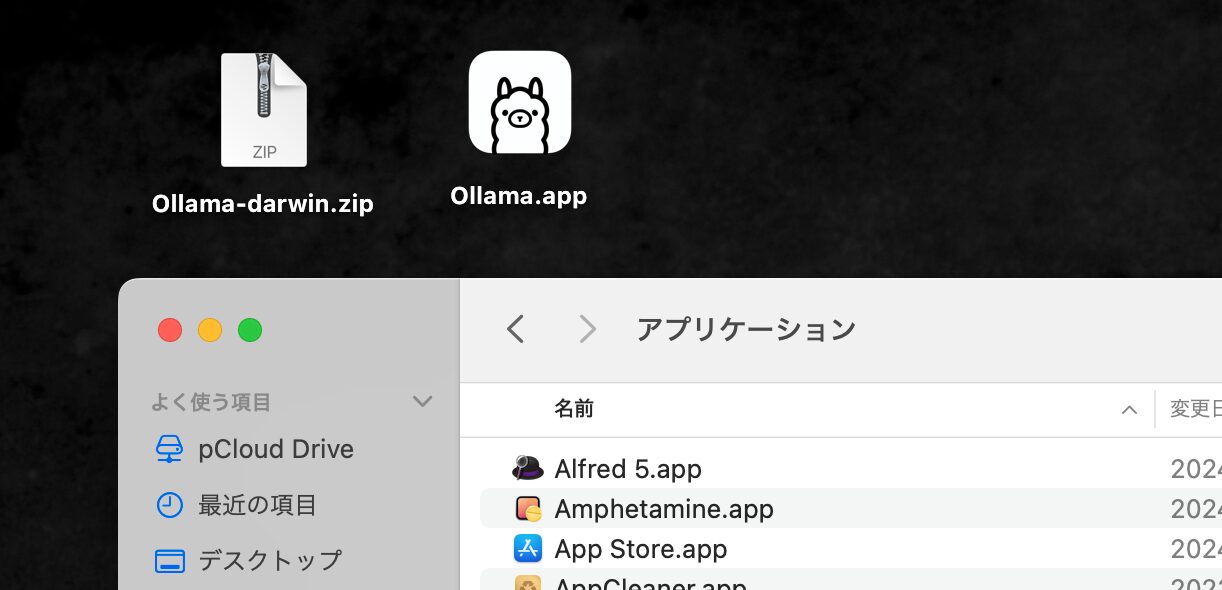
Unzipping the downloaded .zip file reveals an Ollama.app application. Place this in the “Applications” folder in the Mac’s Finder.
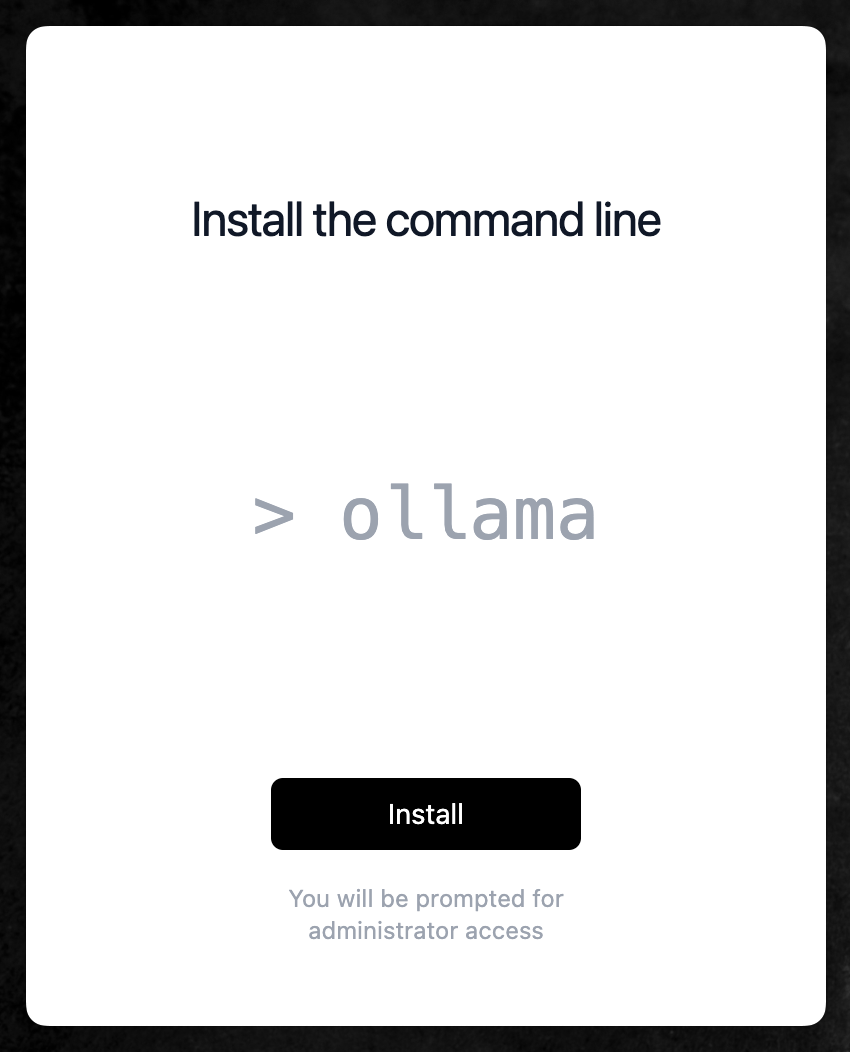
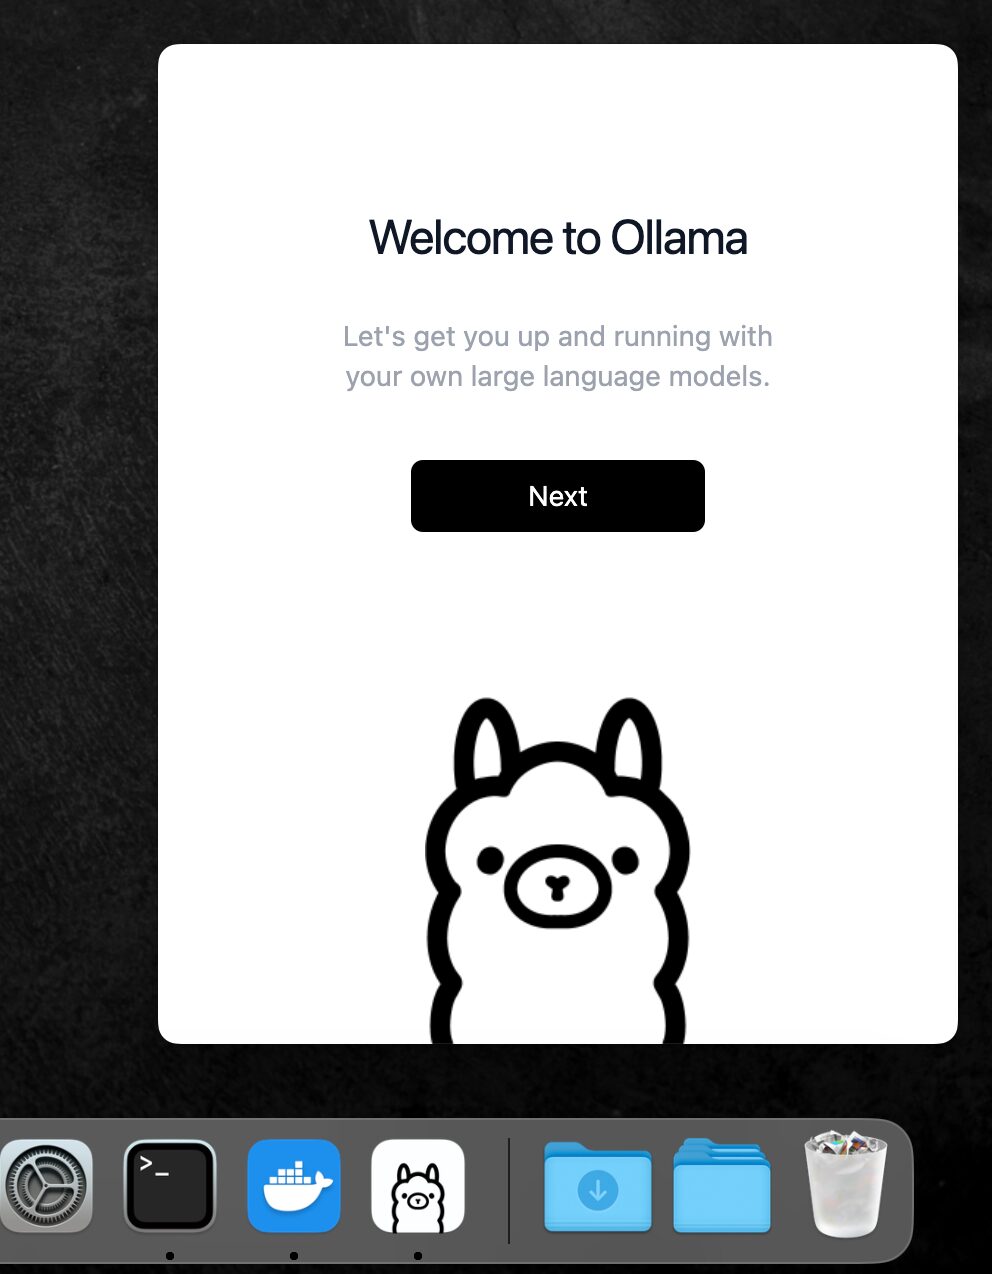
Launching Ollama.app displays an “Install” button as shown below. This is for installing a tool that enables running Ollama-related commands (such as downloading the Llama 3 model) in the terminal.
Clicking the “Install” button prompts for an administrator login. Enter the password to authorize.
With these steps completed, it’s time to download the Llama 3 model.
Downloading Llama 3 8B / 70B Models with Ollama
Downloading files like Llama 3, Llama 2, and Mistral with Ollama is super easy. Just type a single line command into the Mac’s “Terminal” app.
Simply write the model name you want to download and launch after “Ollama run” as shown below. The model download should start on the first run.
ollama run llama3
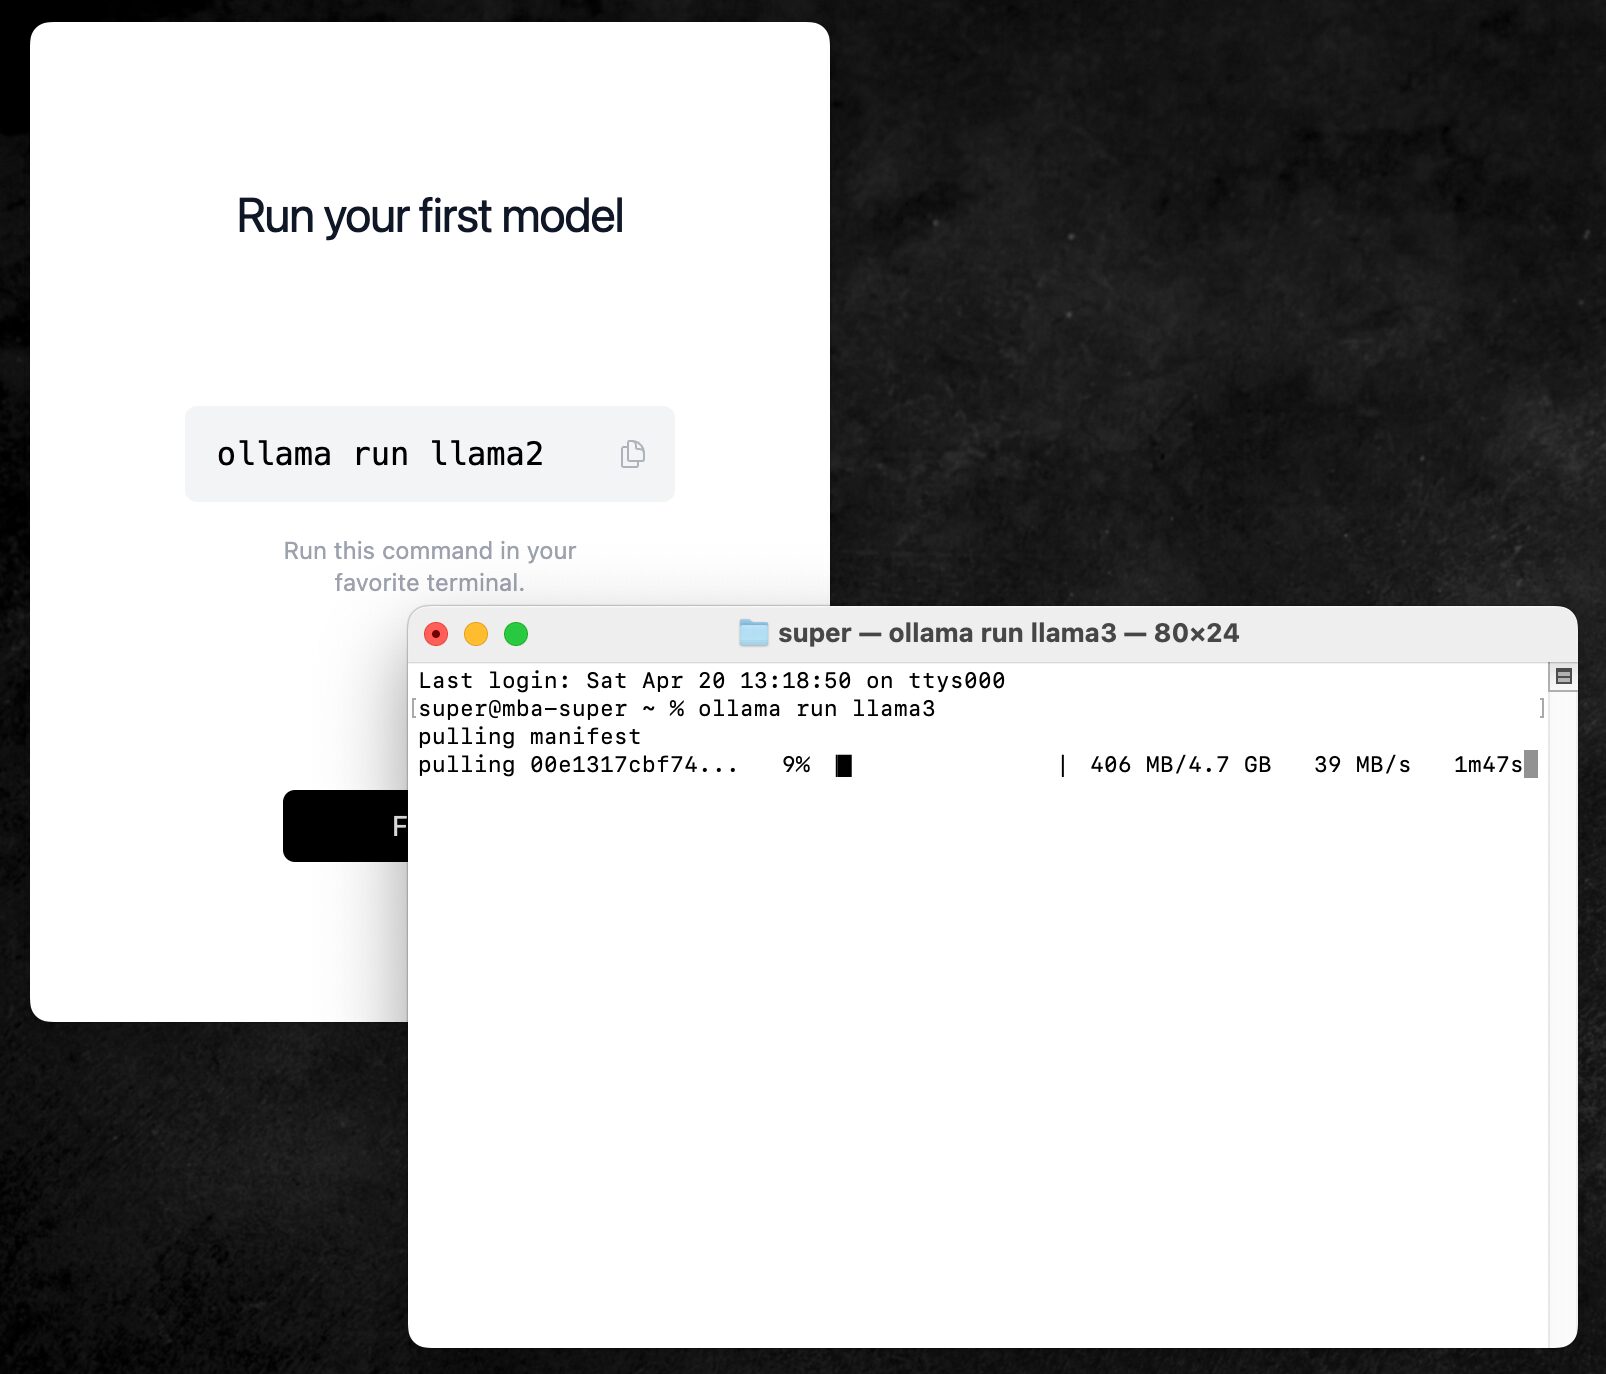
The model downloaded with this command is the smallest in the Llama 3 model series, the “8B” model with 8 billion parameters. For the 8B model, the size of the downloaded file is 4.7GB.
The ollama run llama3:70b command allows downloading the 70B model with 70 billion parameters, but the size reaches 40GB.
As mentioned later, the 70B model is too slow to be usable on personal Mac Book-class devices. Unless using a high-spec GPU like the RTX 4090, the 8B model should suffice for local LLM use.
Chatting with Llama 3 in the Terminal
Once the model download is complete, chatting with Llama 3 is possible directly in the Mac’s terminal.
To converse with Llama 3 in the terminal in the future, type ollama run llama3 just like during the initial download to reach the same state.
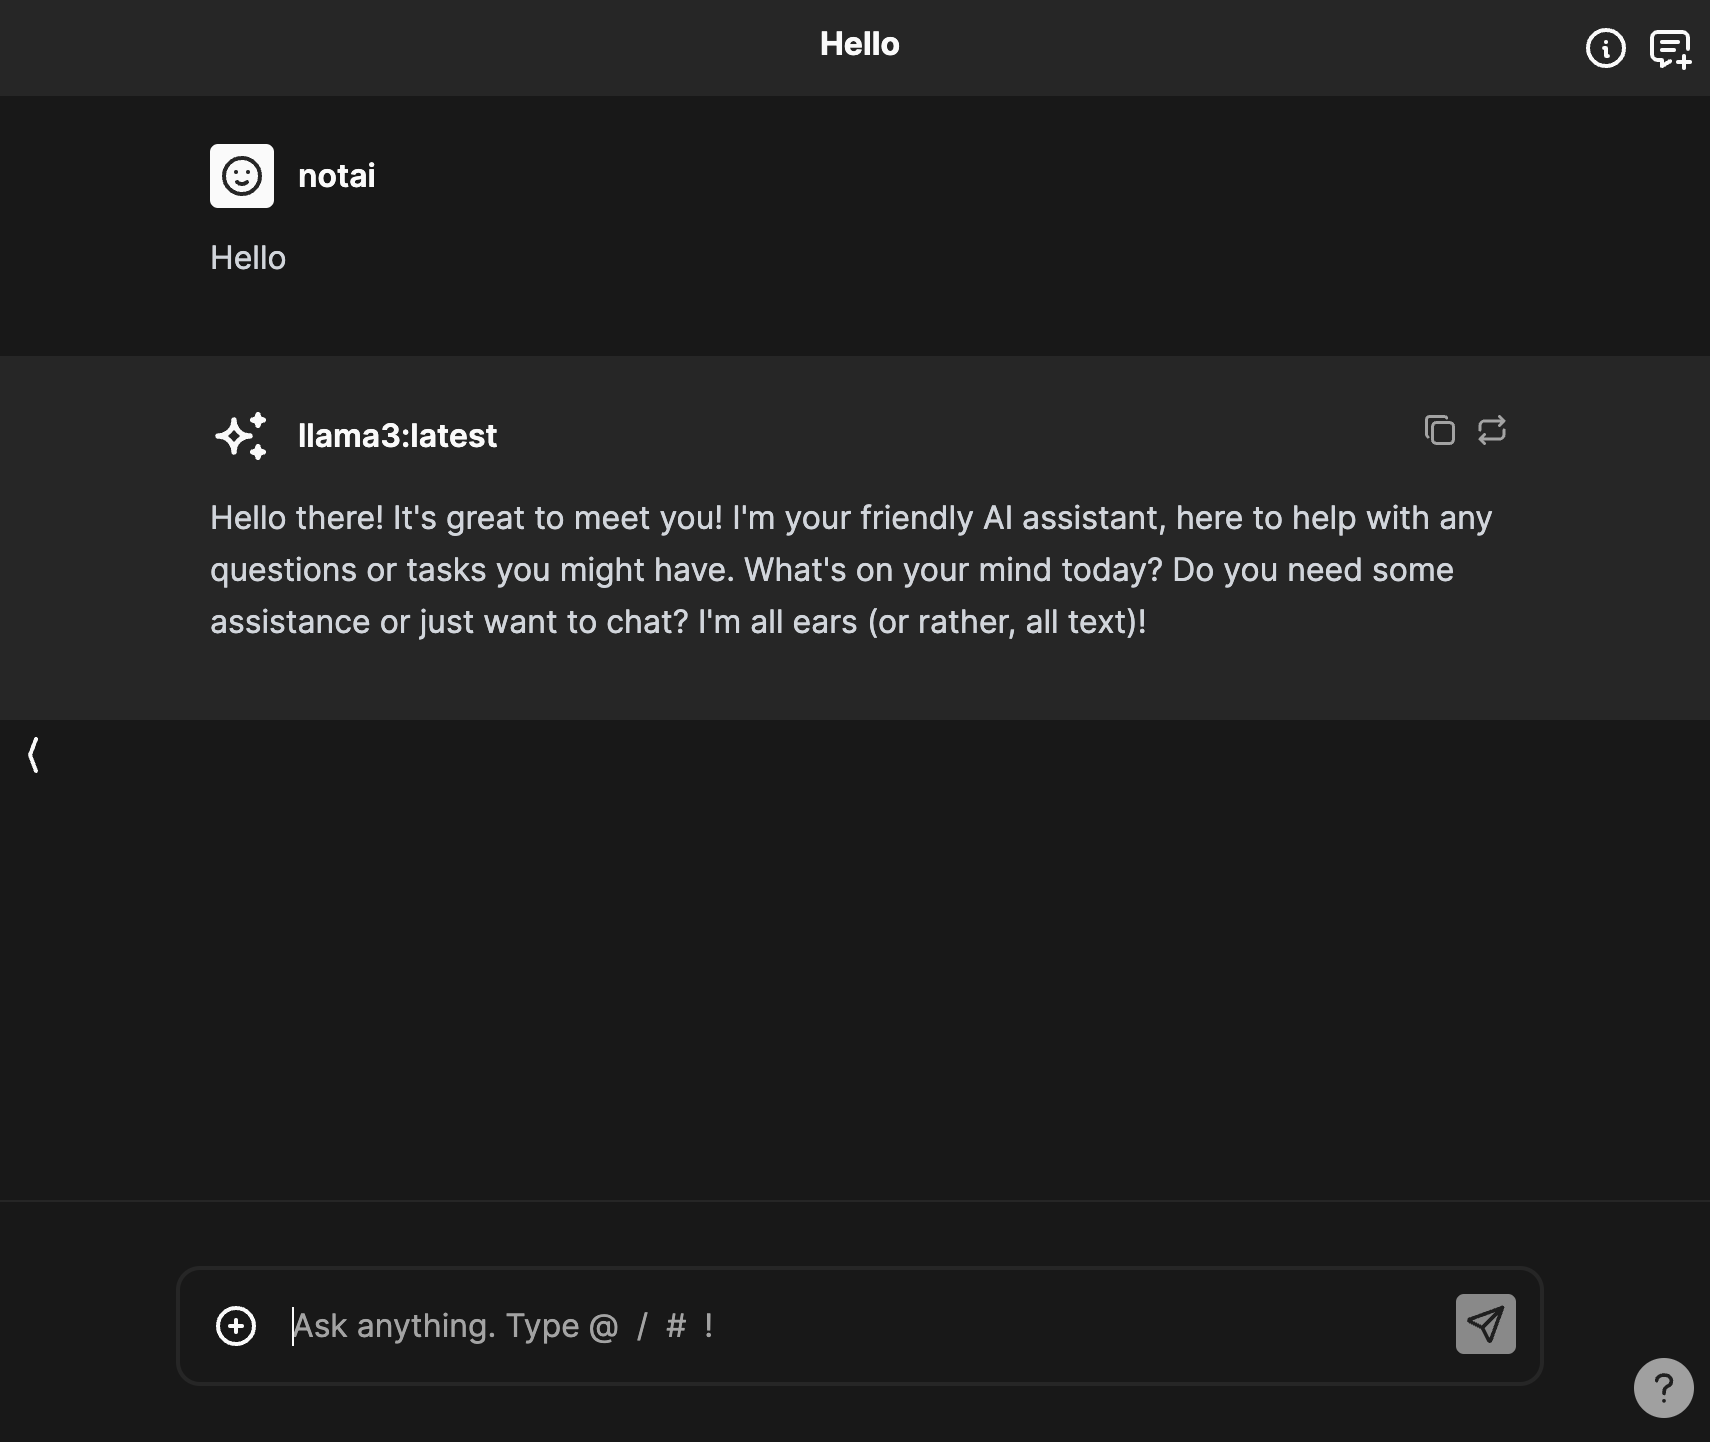
Typing “Hello” into the terminal and pressing enter quickly returned the response, “Hi! It’s nice to meet you. Is there something I can help you with or would you like to chat?”
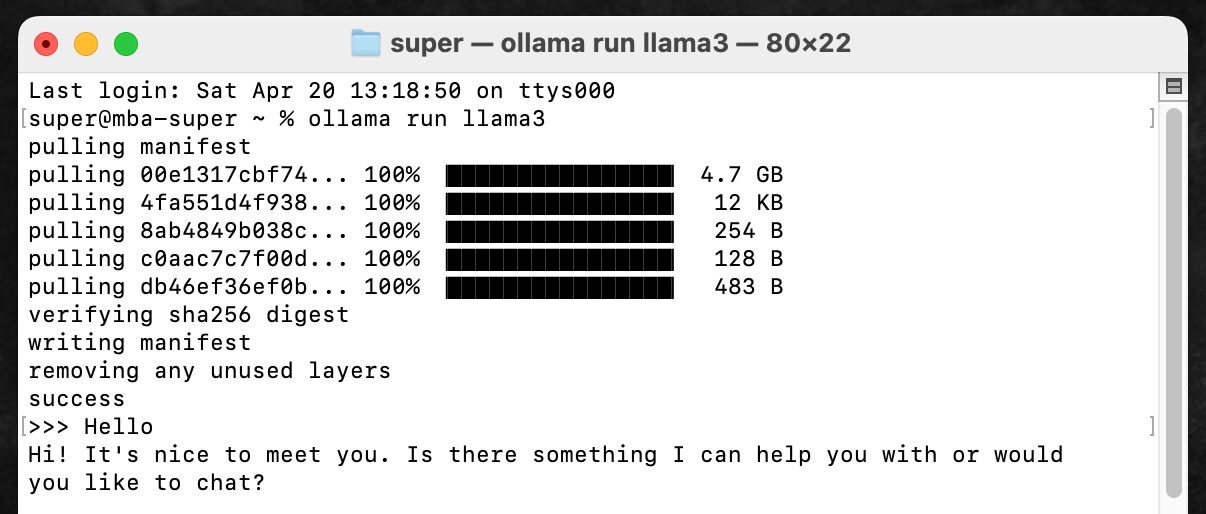
The Llama 3 8B model is the smallest in the Llama 3 series, but for daily conversation level, it’s possible to have conversations in English with almost no unnatural wording.
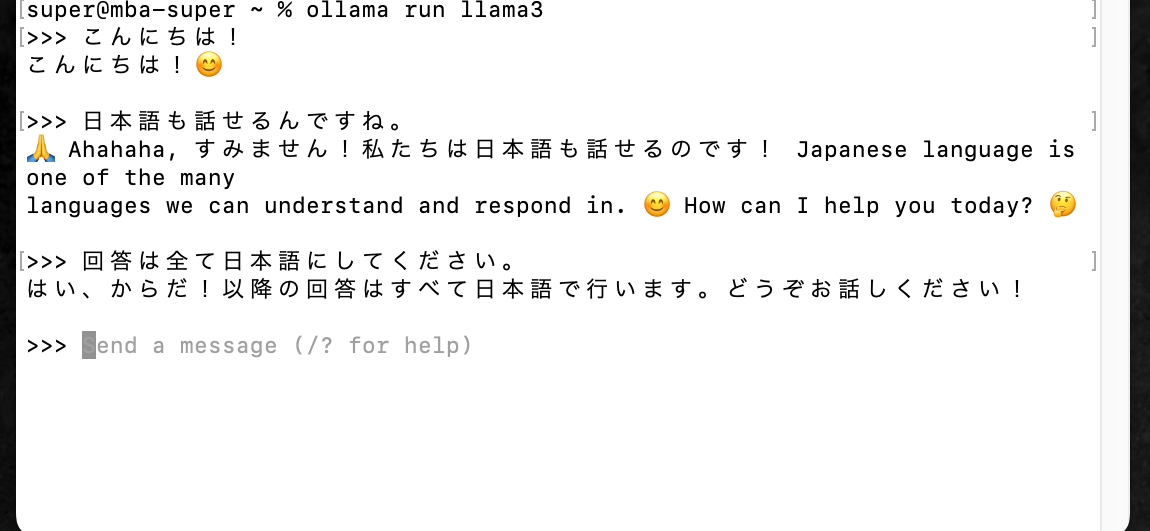
Conversations are possible in languages other than English, but are not expected to be as accurate as in English.
When spoken to in Japanese, the conversation becomes a mix of English and Japanese, or the Japanese is slightly off, feeling like talking to a non-native friend who has started studying Japanese.
Even on a Mac Book Air, the speed is fast enough for practical use.
It’s shocking that the era has arrived where large language models of this accuracy can run smoothly on general consumer laptops.
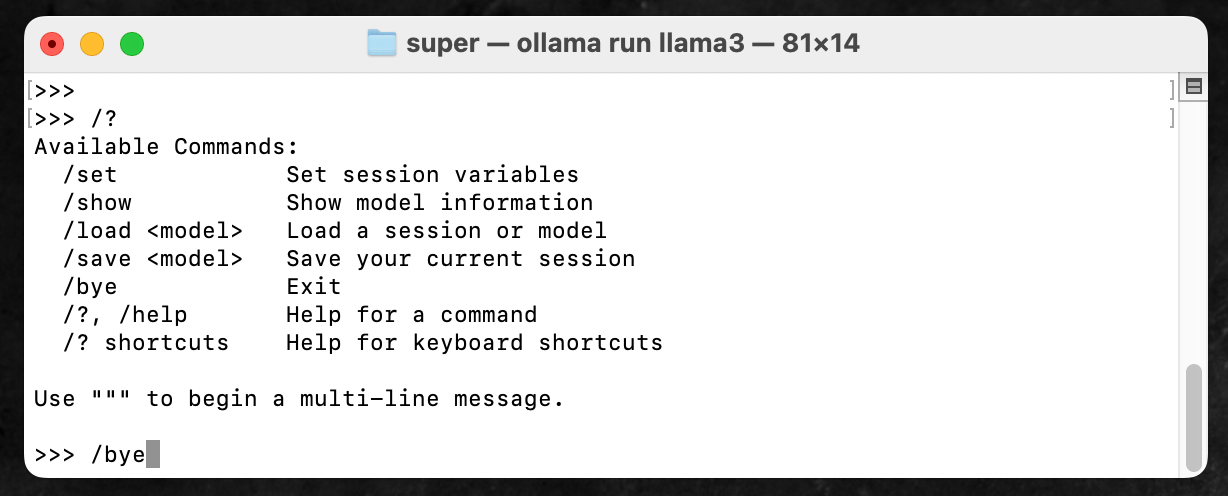
The following commands can be used while chatting with Llama 3 in the terminal.
/bye ends the chat and returns to the normal terminal, so type /bye when finished.
Can the Llama 3 70B Model Run on a Mac Book Air?
I tested the 70B model on my 2024 Mac Book Air with the Apple Silicon M3 chip and 16GB of memory, and here are the results of chatting with it.
I measured the time it took from typing the message “Hello” to displaying the two-word response “Hi!” (consisting of “Hi” and “!”).
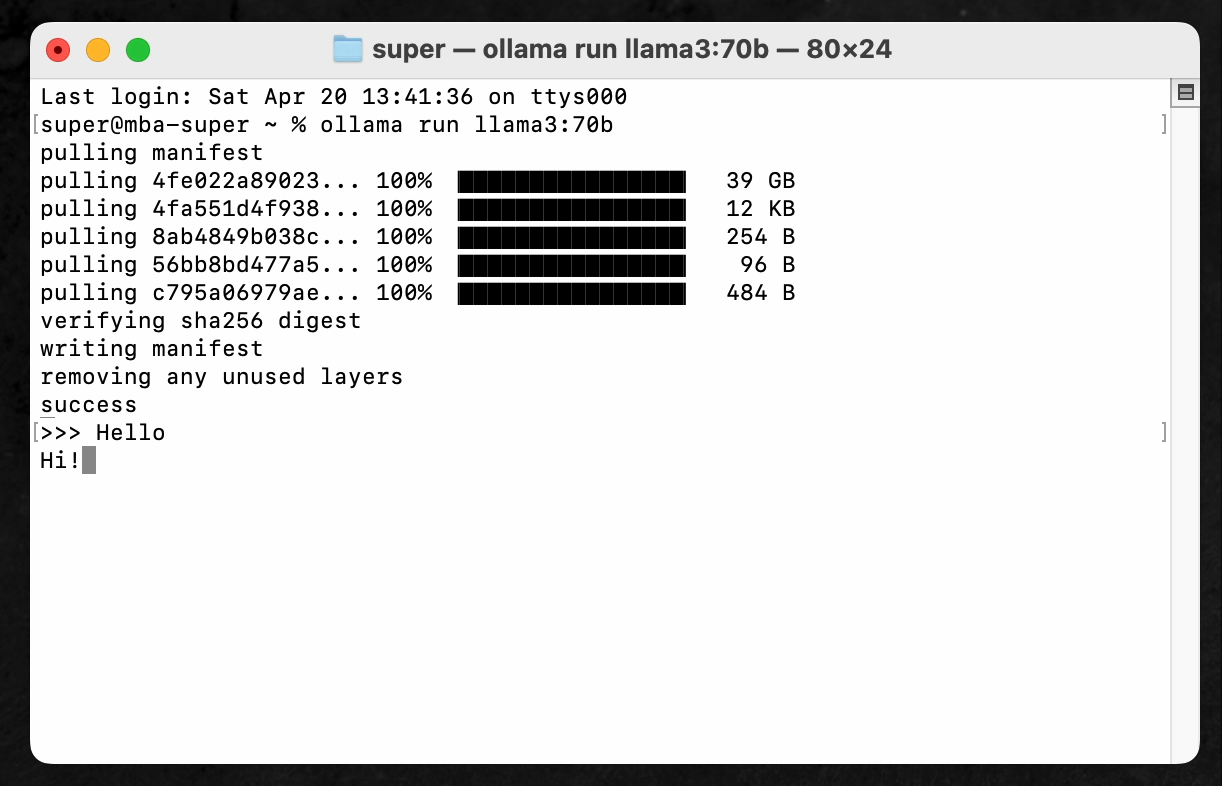
It took 1 minute and 10 seconds for “Hi” to be displayed, and then another 1 minute and 8 seconds for “!” to appear after that. If it takes over 2 minutes just to get a response of only two words, it’s frankly difficult to use in practice.
To use the 70B model locally, you’ll likely need a PC equipped with a high-performance GPU like the RTX 4090, otherwise it will be tough.
If you’re using the Llama 3 8B model and want to use the more accurate 70B model, or the 400B model that is said to be currently training, realistically it would be cheaper to use a cloud API service.
By the way, to delete a model you’ve installed in Ollama, run the following command in the terminal. I removed the 70B model from my Mac Book Air since it was completely unusable.
ollama rm llama3:70b
If you uninstall Ollama itself, you won’t be able to use this command, so make sure to properly delete any unwanted models.
How to Use “Llama 3” with a ChatGPT-like Chat UI
With the above steps, we were able to install a Llama 3 model that can be used locally on a Mac Book Air.
However, Ollama alone can only be used in the terminal, which is very difficult for people not used to terminals, and the functionality is limited in the first place.
Ideally, we’d like to conveniently use it with a chat-style UI like ChatGPT.
Tools like “Open WebUI” and “ChatbotUI” fulfill this wish by allowing you to use local generative AI models downloaded via Ollama, such as Llama, in a chat interface.
Both “Open WebUI” and “ChatbotUI” are open-source applications that anyone can use for free.
They allow you to call up local models available through Ollama, such as Llama 3 and Mistral, in a browser and chat with each model in a chat-like interface.
Furthermore, if you enter an OpenAI API key, you can also use models like GPT-4 Turbo, although it requires an online connection. So if you simply don’t want to pay for a monthly ChatGPT subscription, you can enter your API key into “Open WebUI” or “ChatbotUI” and use the latest models that way.
Here, I’ll introduce how to chat with Llama 3 using both “Open WebUI” and “ChatbotUI”.
“Open WebUI” has a simpler installation process, so it’s recommended for beginners.
“ChatbotUI” is slightly more troublesome to install, but in addition to Llama 3 and GPT-4 Turbo, it can also utilize Anthropic’s Claude 3 API and all sorts of other local models and APIs, so it’s much more feature-rich than “Open WebUI”.
If you want to try out various local AIs and API-based AIs in the future, I recommend using “ChatbotUI”.
Using “Open WebUI” to Comfortably Utilize Local Models
First, let’s introduce how to install Open WebUI. Before installing the WebUI itself, some preparation is necessary as you also need apps like Docker Desktop.
Installing Docker Desktop
First, you need to install an app called “Docker Desktop”.
Docker Desktop is a tool that makes it easy to use Docker on Windows and Mac. Docker is a system that packages the environment necessary to run applications in a form called “containers”.
It’s good to have the image that you can copy the entire environment (container) necessary to run complex programs like Open WebUI, and recreate it on your Mac with a single click.
With Docker Desktop, even without programming knowledge, you can create “containers” designed by others on your own PC and run Open WebUI inside them.
First, access the Docker Desktop website and download and install Docker Desktop for Mac.
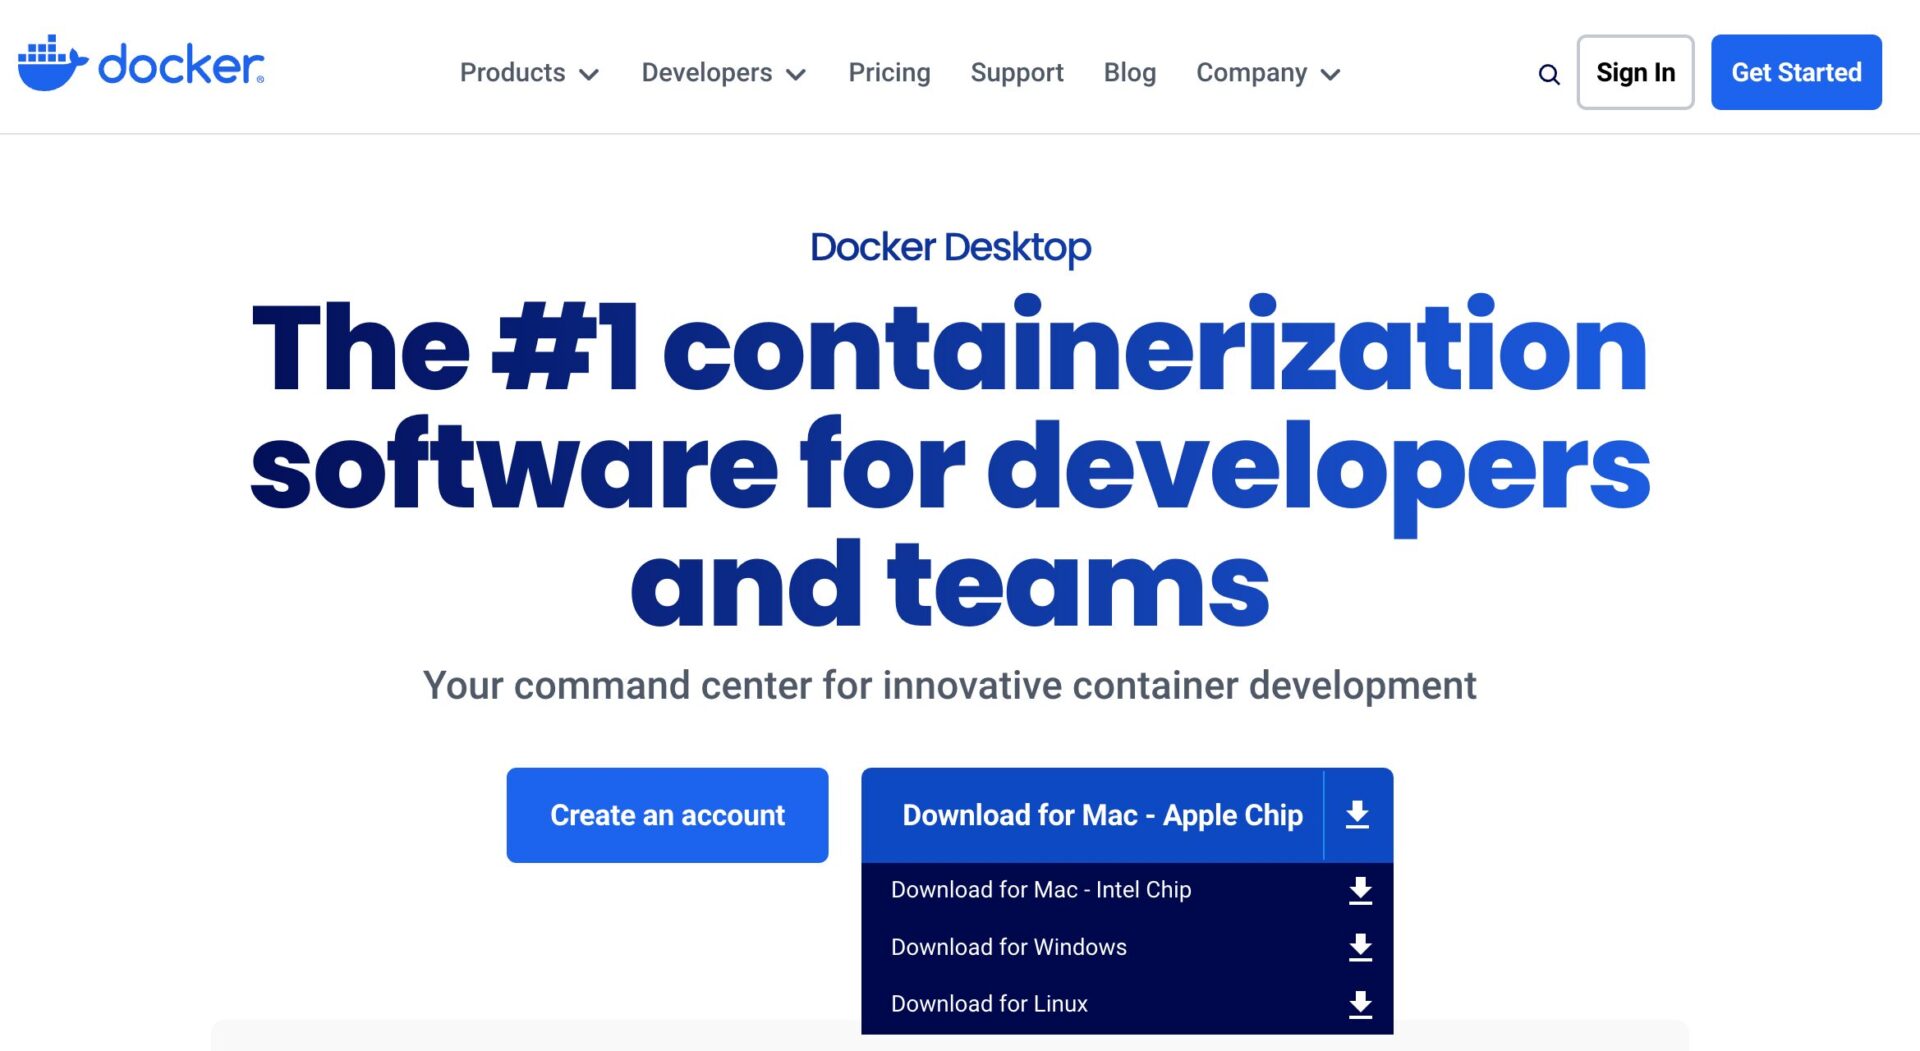
Once Docker Desktop is installed, try launching it once. If it starts up without any issues, proceed to the next step (Docker Desktop needs to be running when you want to use Open WebUI).
Installing Open WebUI
Copy and paste the startup command listed on the Open WebUI documentation page directly into a command line tool such as the “Terminal” app on Mac, and execute it.
To run it on a Mac, as of the time of writing this article (April 2024), you can copy and paste and execute the following command.
This command uses the Docker command to create a container dedicated to Open WebUI.
docker run -d -p 3000:8080 --add-host=host.docker.internal:host-gateway -v open-webui:/app/backend/data --name open-webui --restart always ghcr.io/open-webui/open-webui:main
When you execute it in the terminal, you will see file downloads starting one after another as shown below, and when everything becomes “Pull complete”, the download is finished.
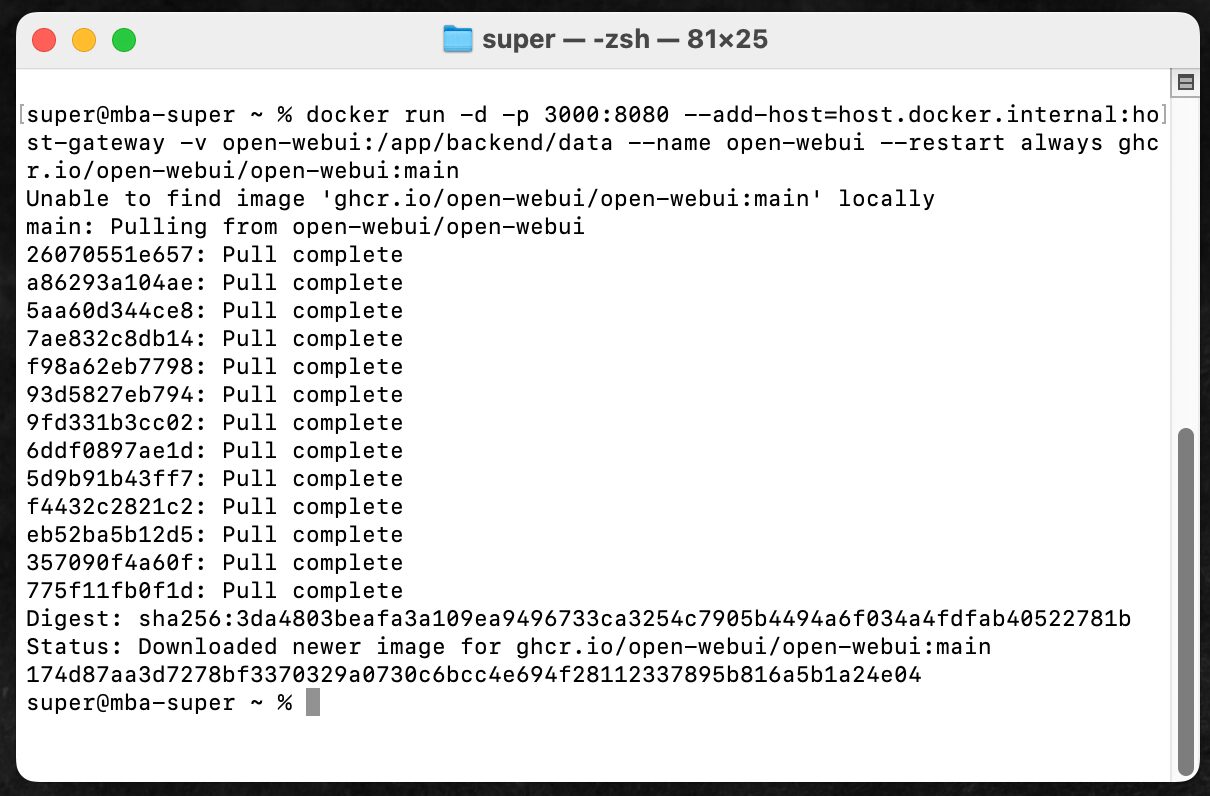
With just this, Open WebUI is now available on your Mac.
The installation is extremely simple, so even programming beginners who have never used the terminal should be able to use it without any problems.
How to Use Open WebUI
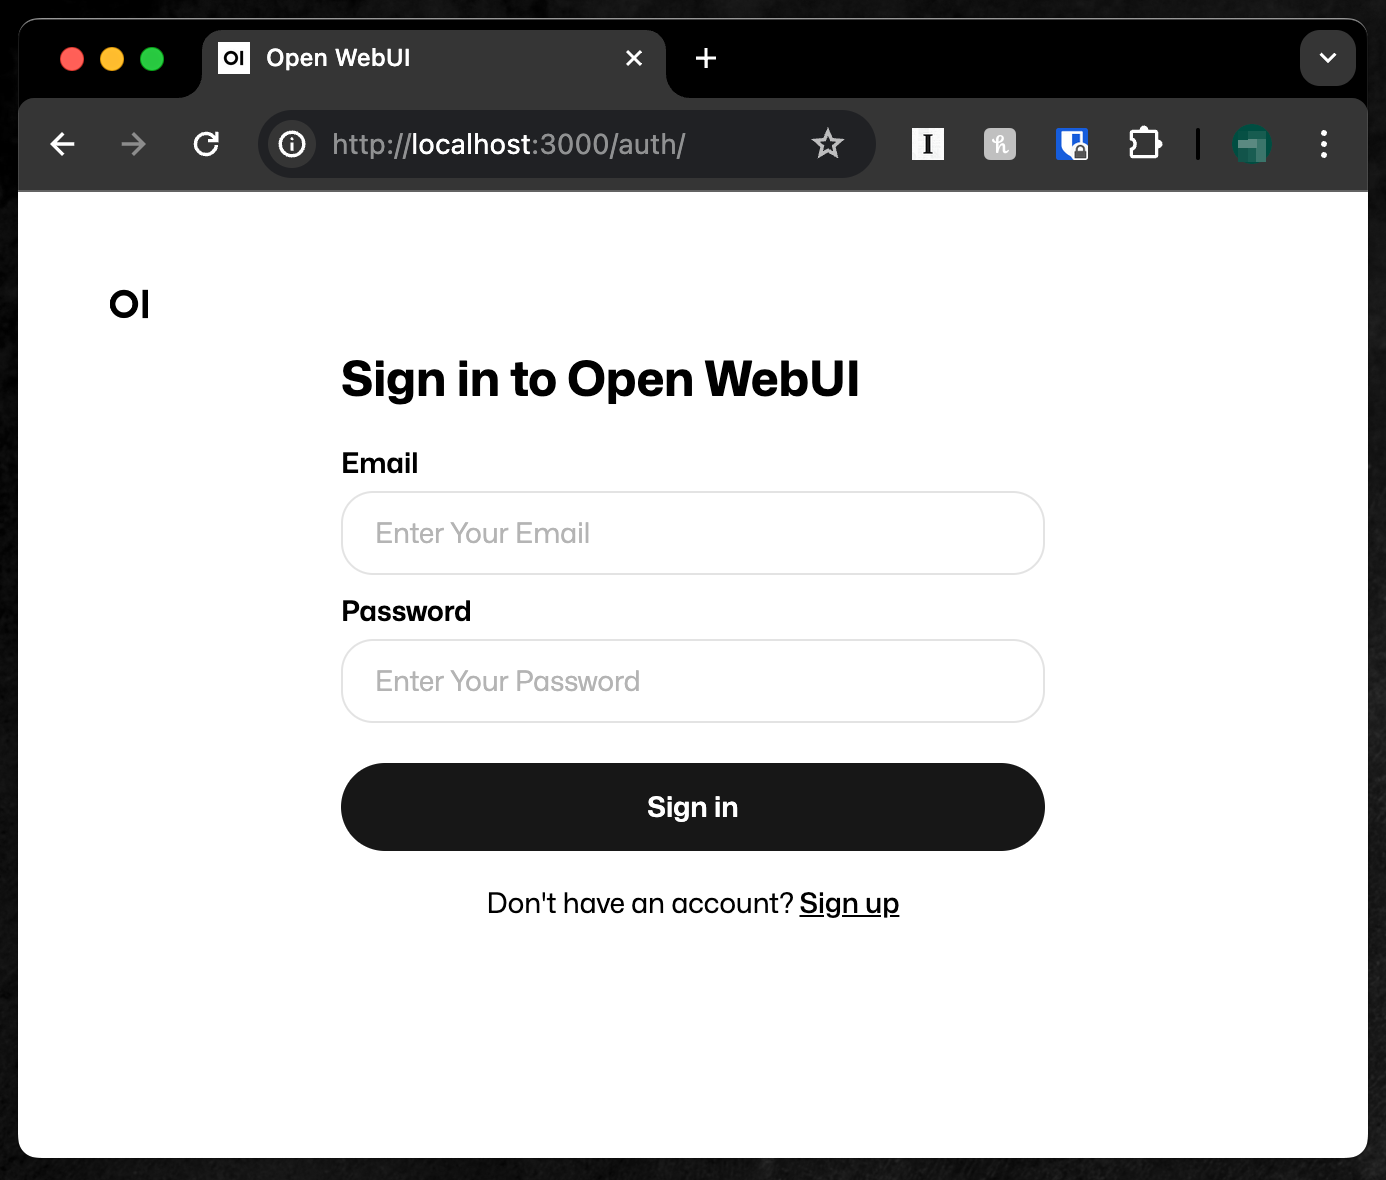
Once you have executed up to this point, open a browser such as Chrome or Safari and access the following URL.
Since Open WebUI is running locally, you can connect to it in your browser even when offline.
http://localhost:3000
Accessing http://localhost:3000 should display the login screen for Open WebUI.
When using it for the first time, you need to click “Sign UP” at the bottom to create your own account.
When you log in, you should immediately see a chat-like user interface as shown below.
From the “Select a model” dropdown menu displayed at the top of the screen, you should be able to select the Llama 3 8B model that you installed earlier with Ollama.
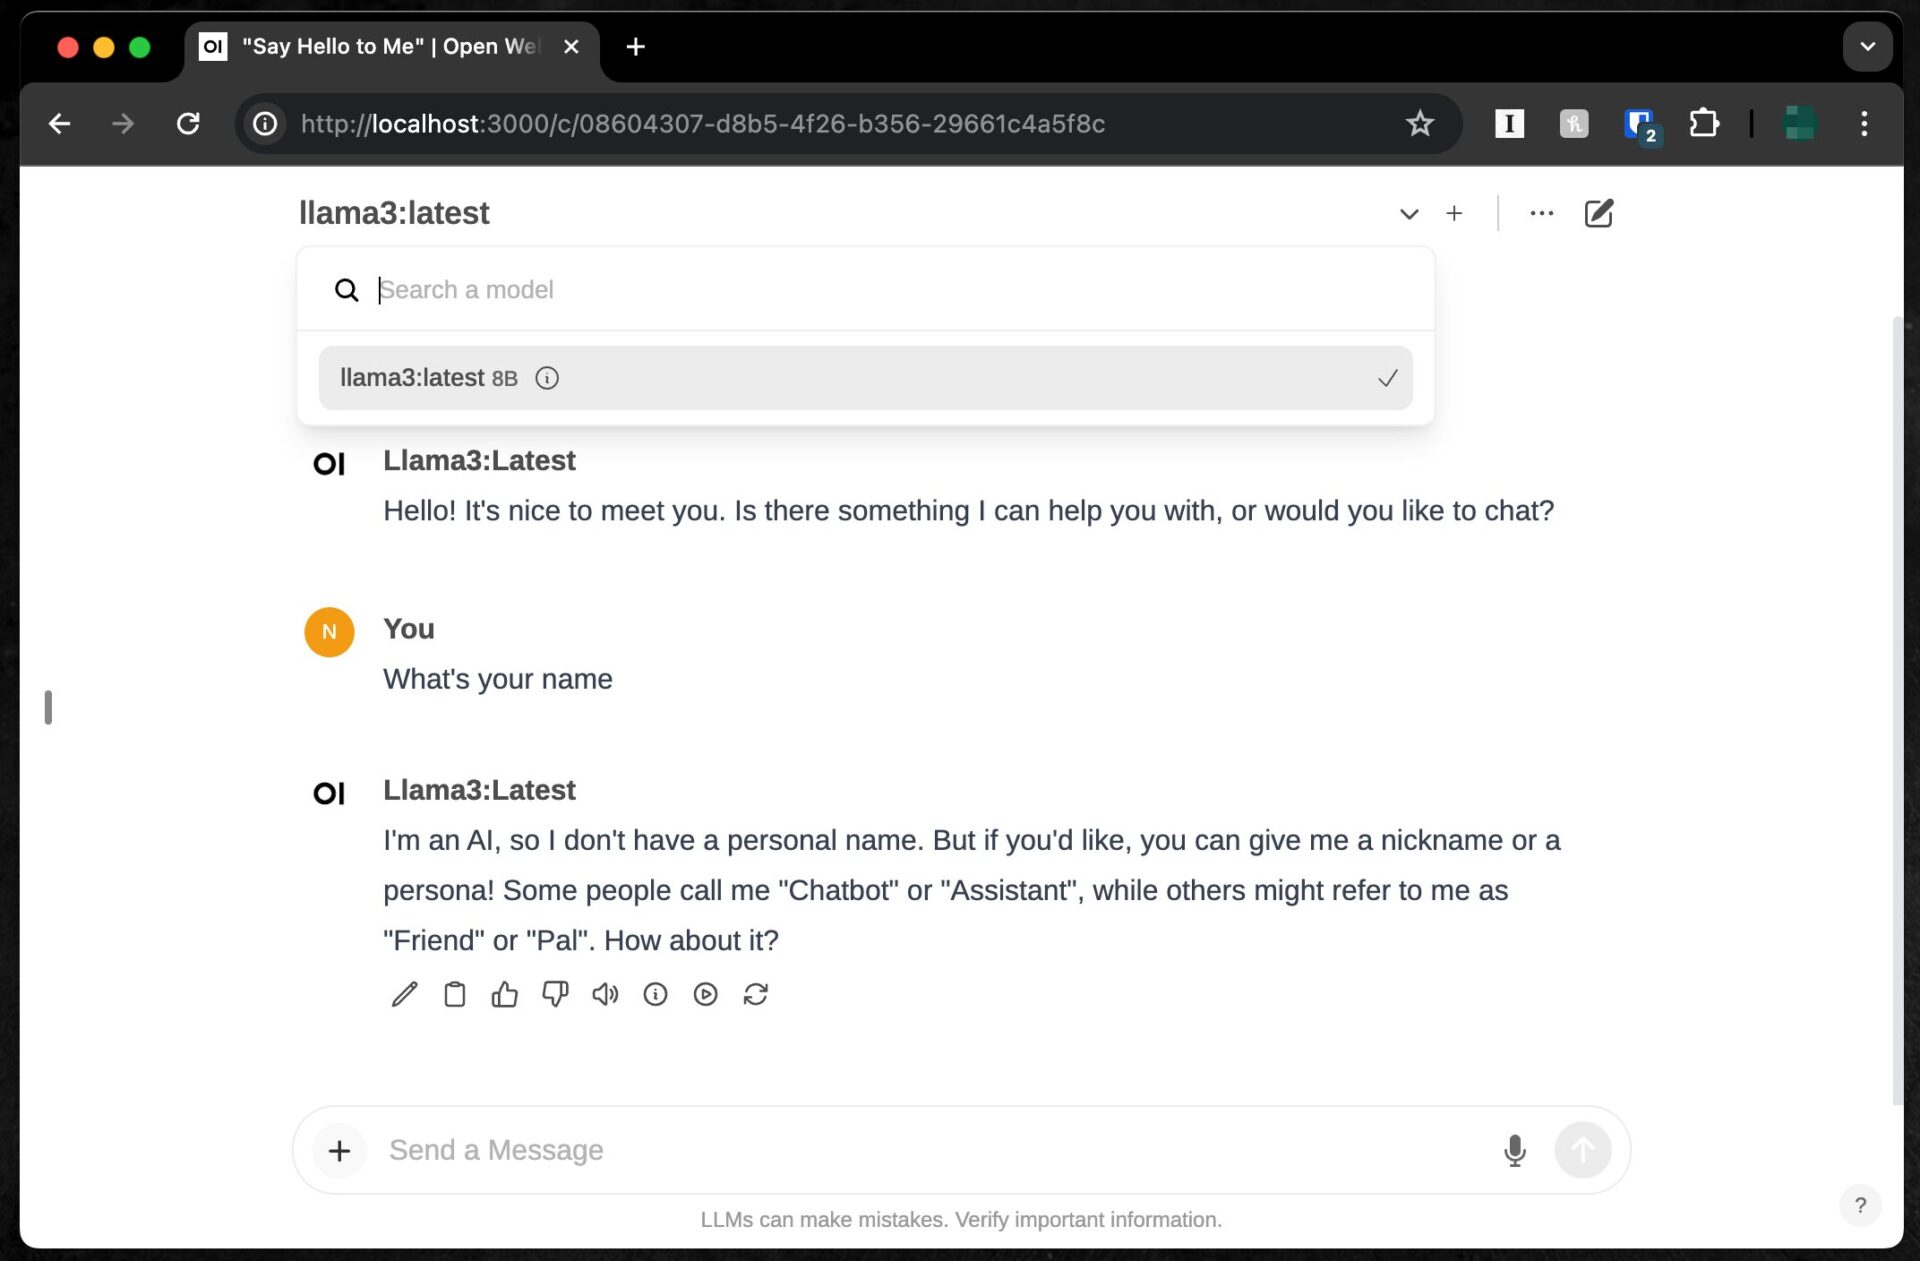
If Llama 3 is not displayed, check if Ollama is running.
Before accessing the http://localhost:3000 URL and launching Open WebUI, you need to start the Ollama app.
If Ollama is not running, Open WebUI cannot call Llama 3, so if you forgot, close Open WebUI once and restart it.
Before clicking http://localhost:3000, it’s good to launch the Ollama app as shown below and minimize it. If you see the alpaca icon in the Mac Dock, you’re good to go.
When You Want to Use Open WebUI Again After Restarting or Shutting Down
Once you have installed Docker Desktop and Open WebUI, you can launch Open WebUI as many times as you want by simply accessing http://localhost:3000.
There is no need to go through the reinstallation process each time.
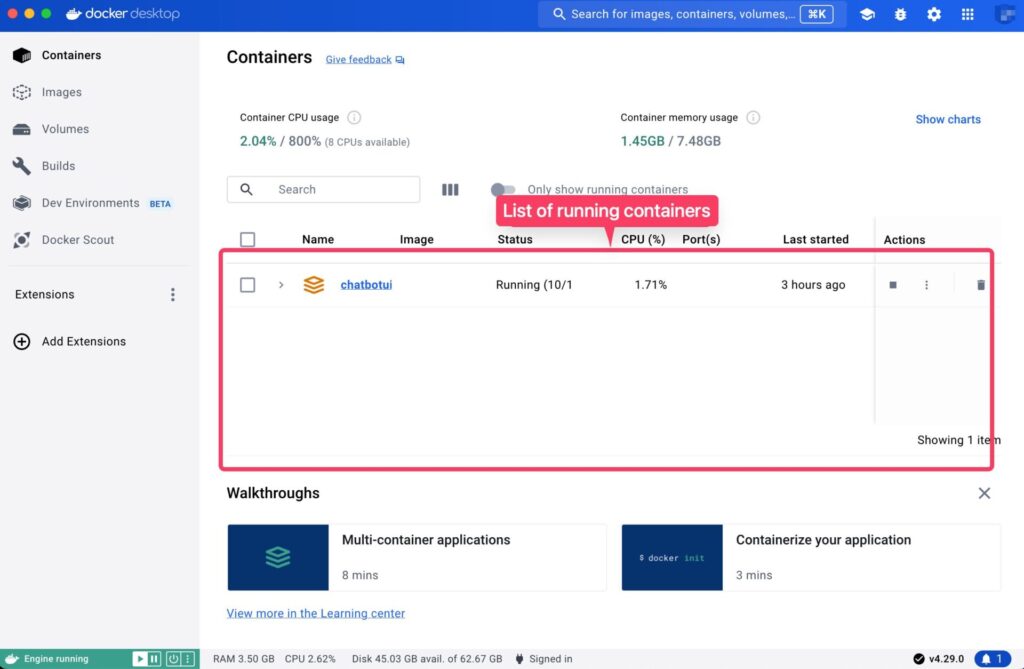
When you launch Docker Desktop, you should see a container called “openwebui” under “Containers”.
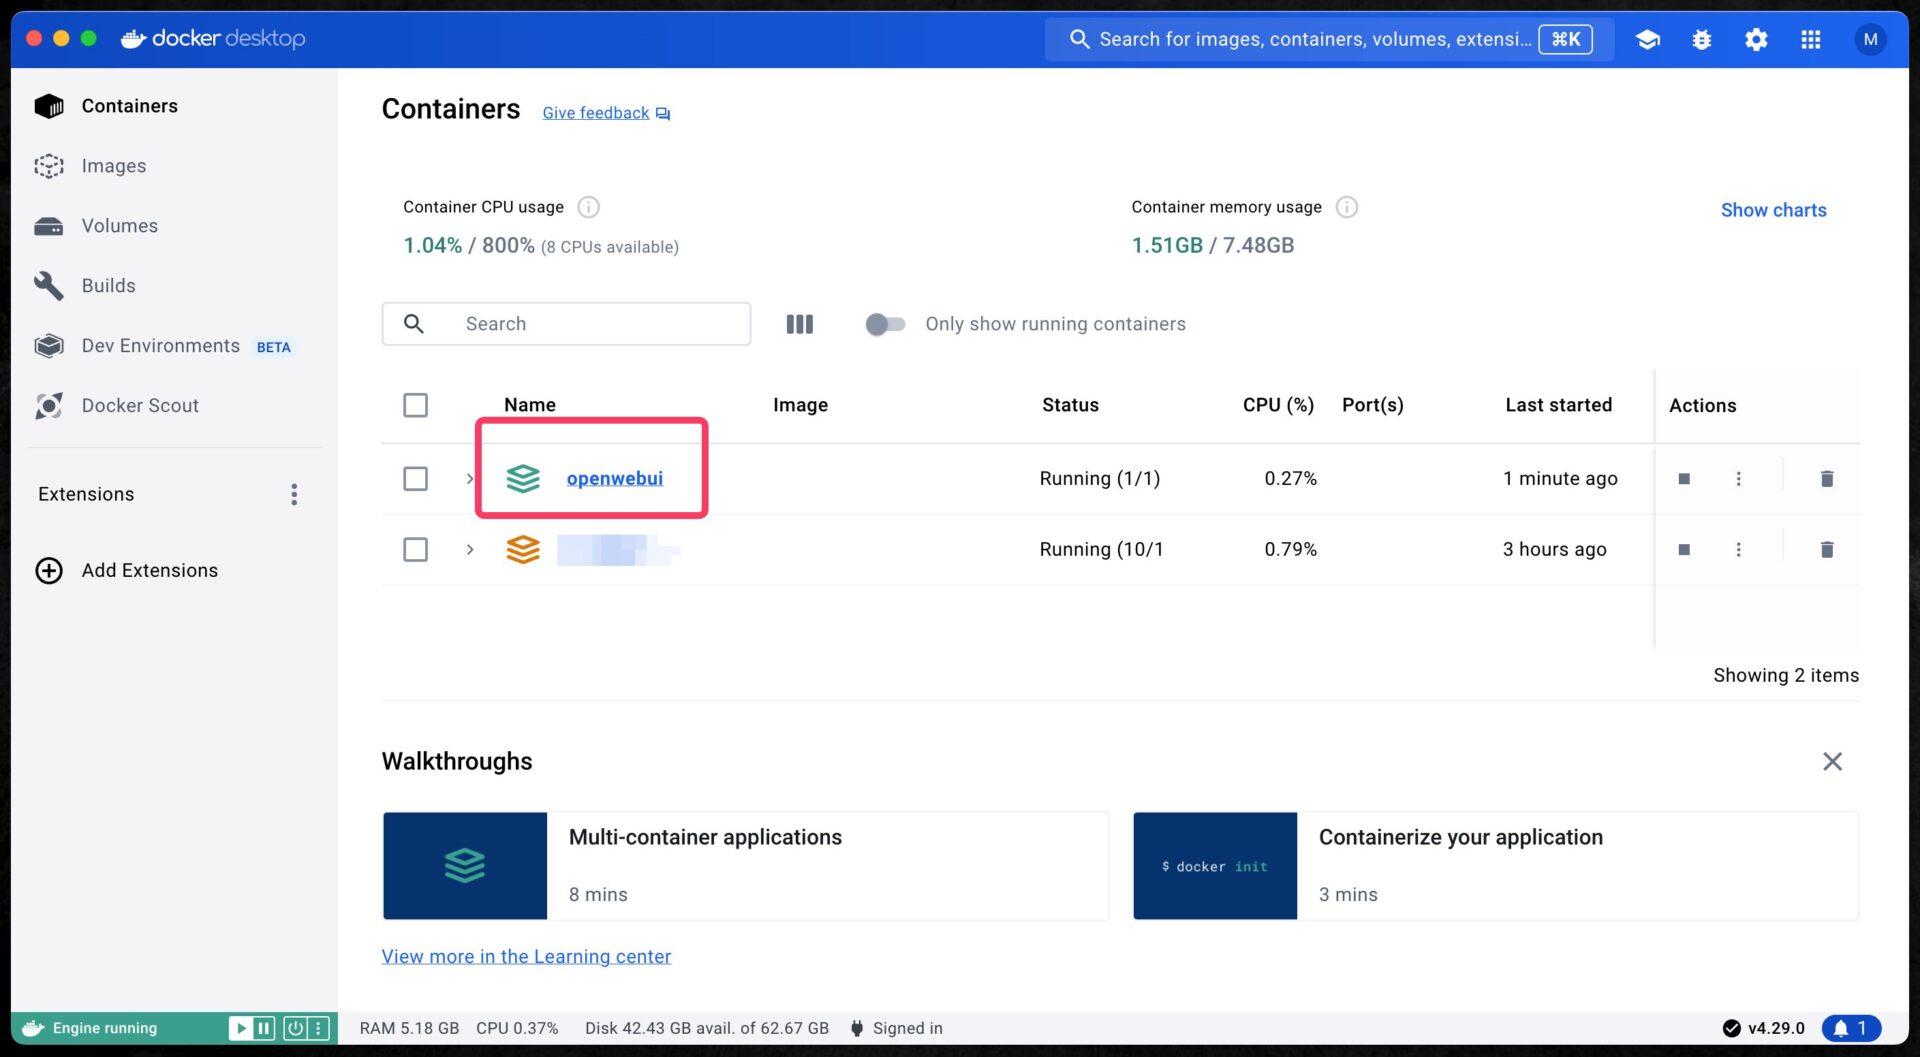
As long as this container exists, you can continue using Open WebUI by simply opening http://localhost:3000 again, even if you shut down or restart your computer.
Conversely, if you want to uninstall/delete Open WebUI, you need to stop the Open WebUI container in Docker Desktop and click the trash can button to delete the container.
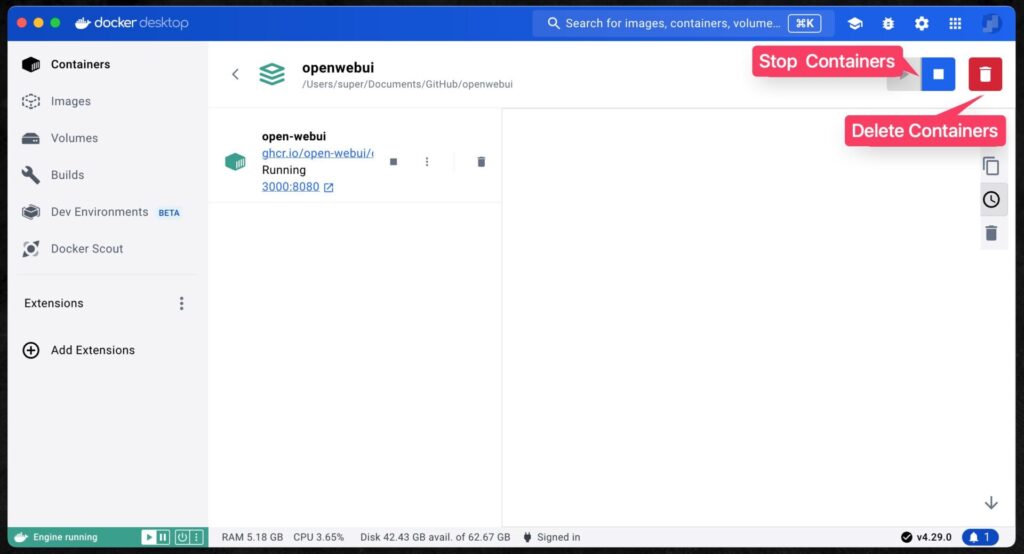
Furthermore, from the “Images” menu, delete the image that the container was based on as well.
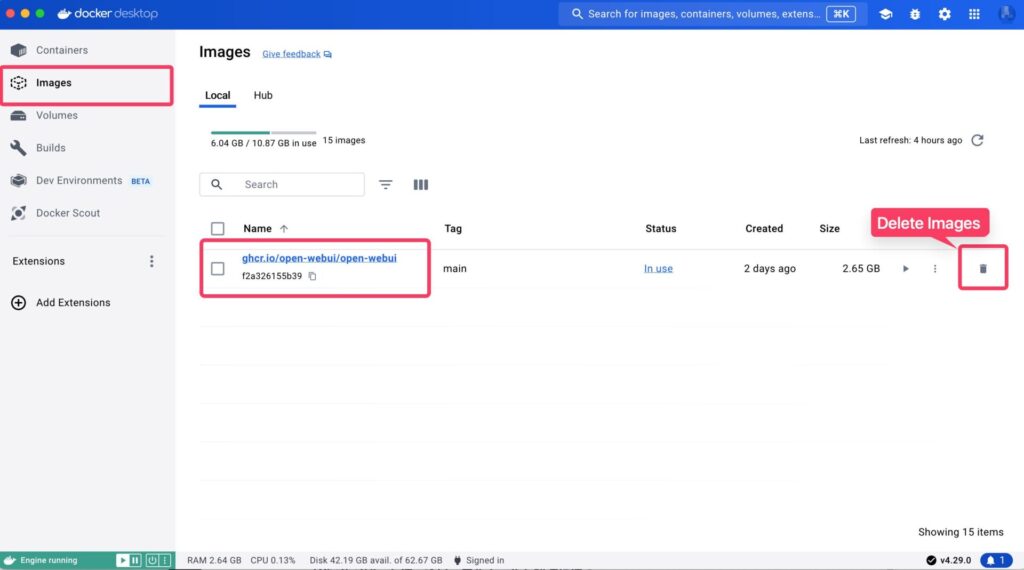
Once you delete the Docker image and container, the entire environment is deleted, so Open WebUI is completely uninstalled.
The installation and uninstallation methods may be unfamiliar as they differ from regular apps, but once you try it, it’s not that difficult of a process.
Even if you have never used Docker before, don’t feel too intimidated and please give it a try.
Using “ChatbotUI” to Comfortably Utilize Local Models
ChatbotUI is similar to Open WebUI in its basic mechanism, and is a chat tool that can utilize local generative AI models such as Llama 3 installed by Ollama in conjunction with Ollama.
However, compared to Open WebUI, in addition to introducing Docker, you also need to install a package manager called Homebrew and execute several commands in the terminal, making the installation a bit more difficult.
On this blog, we have an article that explains in detail how to set up “ChatbotUI”, so please refer to that article for the installation procedure.

Once the installation of ChatbotUI is complete and you launch ChatbotUI with Ollama running (npm run chat command), you can start the chat app by simply opening http://localhost:3000 in your browser.
In the case of ChatbotUI, if you select “Local” in the model selection at the top right of the screen, Llama 3 installed with Ollama should be displayed.
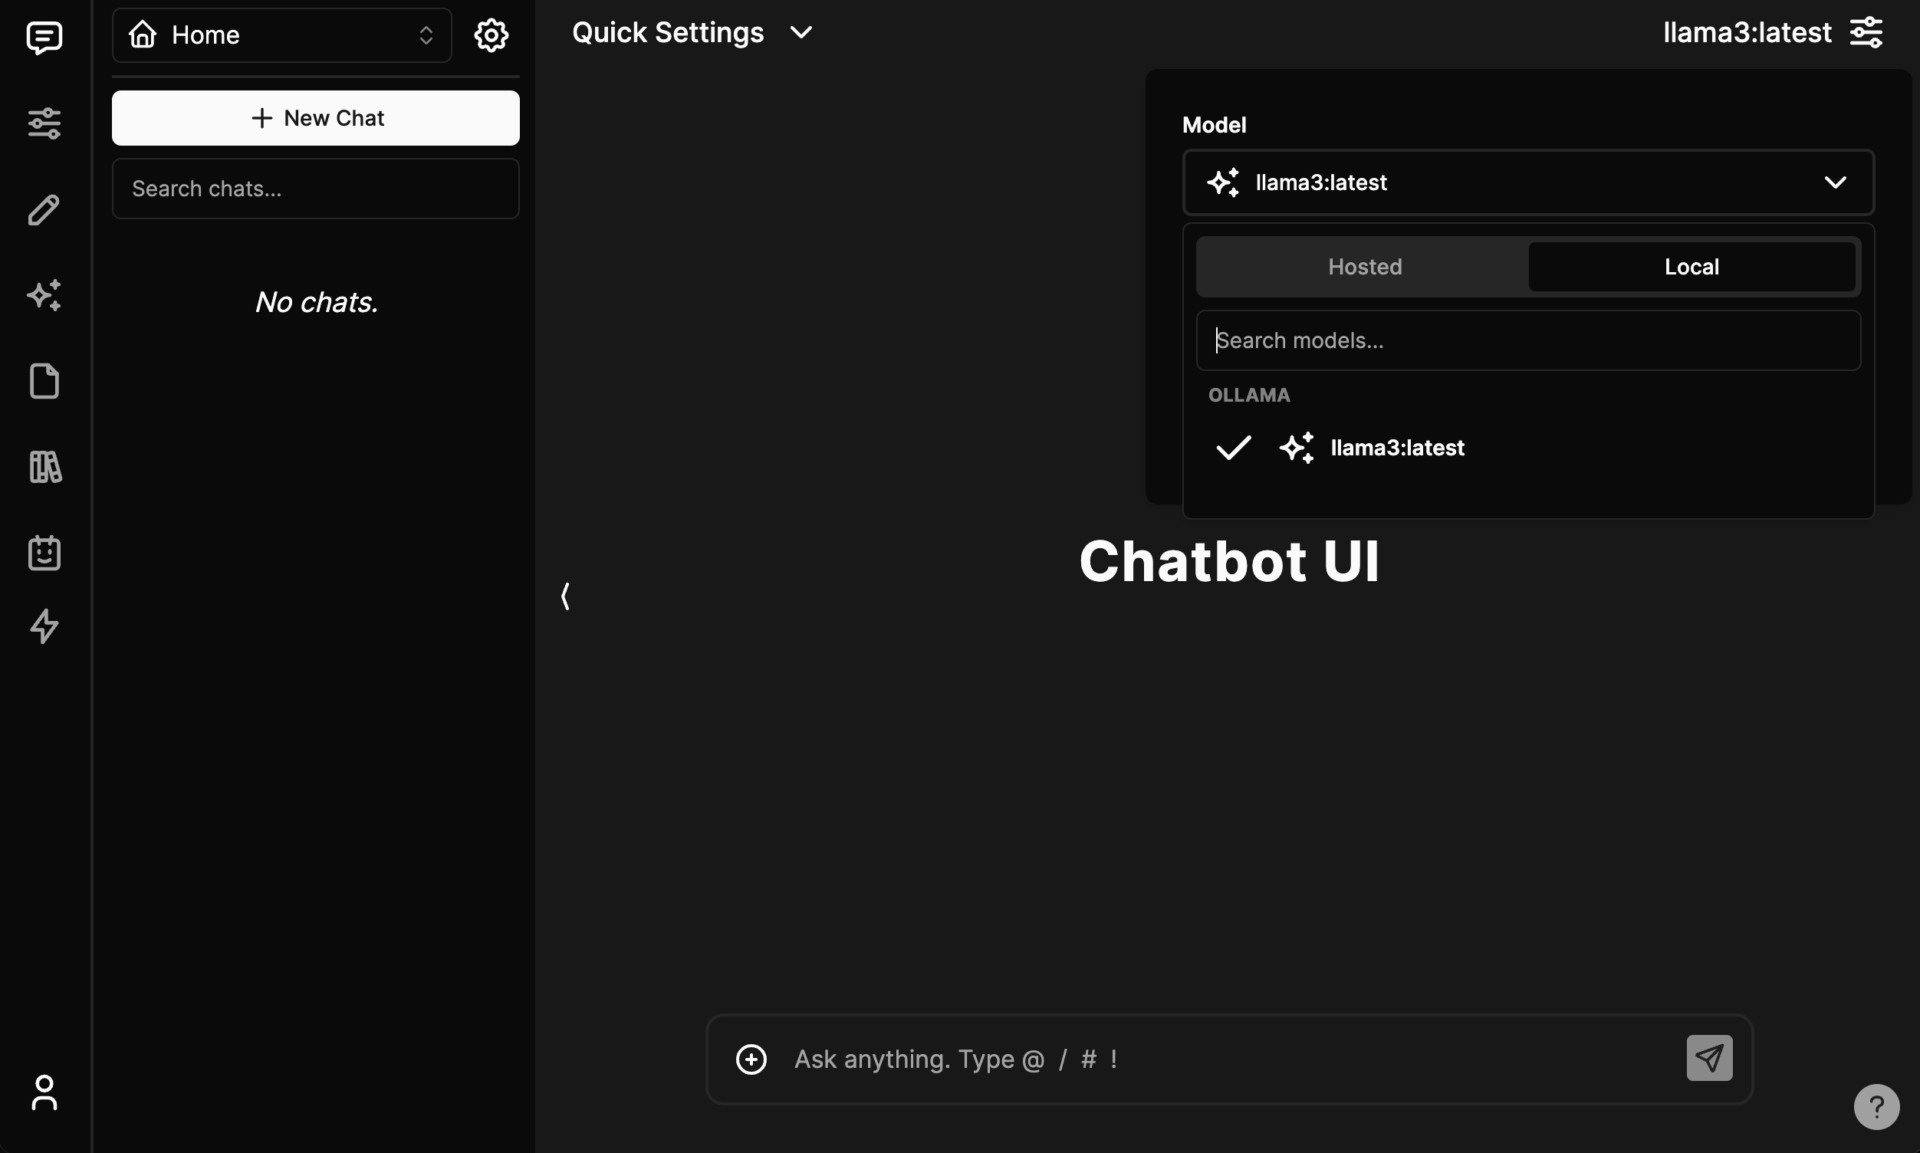
The speed is the same as when using the Ollama terminal, but it’s nice to have an easy-to-use chat screen and be able to upload files intuitively.
Excitement for the Future Development of Local Generative AI
The speed of development in the generative AI community, including Ollama, is remarkable, as evidenced by the fact that an environment for easily running “Llama 3,” the latest generative AI model developed and released by Meta, on Macs and PCs was created the day after its release.
While the 70B model, which has performance comparable to existing well-known models, is too demanding to run on laptops like the Mac Book Air, the 8B model that runs smoothly gives us a sense of future possibilities.
The appeal of local generative AI is that it can be used without an internet connection and without any fees. Additionally, since data is not sent externally, confidential information can be handled with peace of mind.
In particular, the 8B model runs at a fairly practical speed on Apple Silicon Macs, making it easily accessible for many users.
The release of the 400B model is also planned for the future, raising expectations for further evolution of open-source large language models.
Even if the 400B model cannot be run on one’s own PC, it may be possible to cheaply process large amounts of text by renting cloud instances with many high-spec GPUs like the RTX 4090 from rental services such as RunPod and Vast.ai.
For those without programming knowledge, why not try installing Llama 3 on your Mac using this article as a reference and experience the potential of generative AI?